
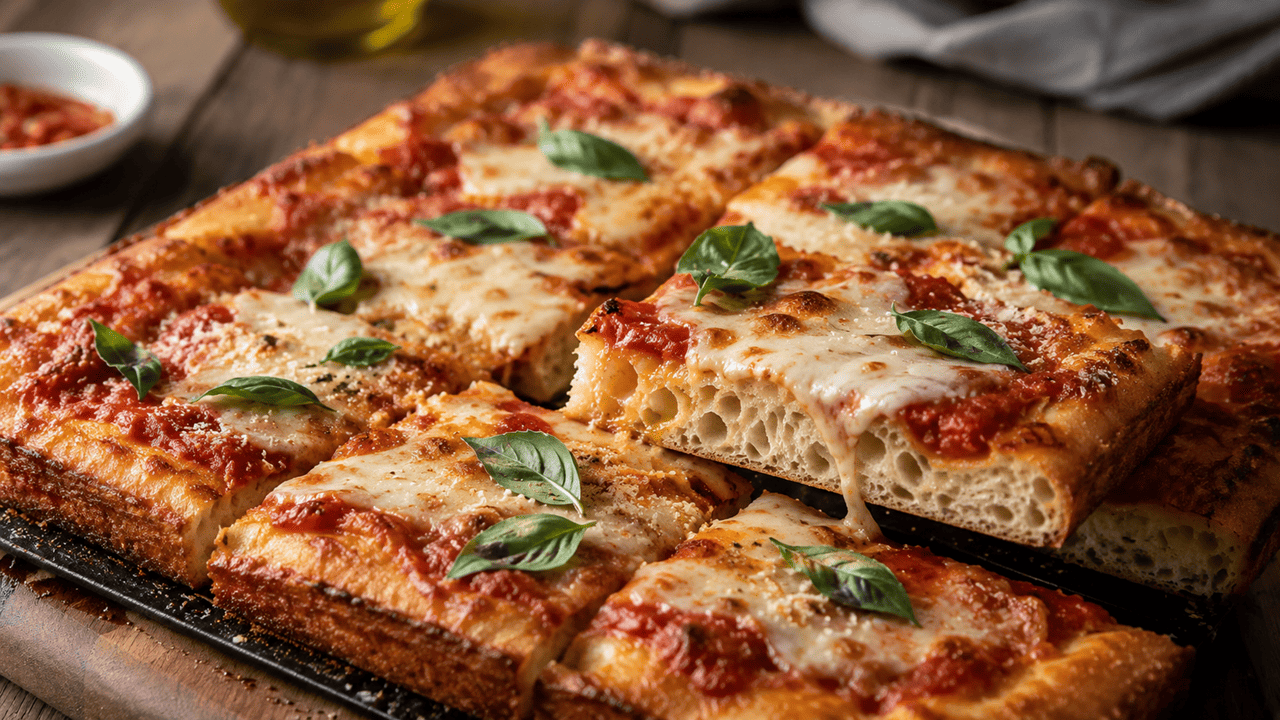
Focaccia pizza is all about balance. The dough is thick, airy, and rich with olive oil. It needs enough time to rise, enough space for those signature bubbles to form, and toppings that won’t weigh everything down. When those pieces come together, you get a crust with a crisp, golden bottom, a chewy middle, and lightly crisp edges that almost fry in the oil. Professional bakers often rely on generous olive oil in the pan and moderate toppings to keep the crust crisp rather than soggy.
The first time I turned focaccia into pizza, I made a mistake that almost ruined the dinner. I treated it like conventional pizza dough, immediately piling on the sauce and toppings. The bread looked lovely when it came out of the oven, but the center remained soft while the edges browned too quickly. After a few more batches, I learned that this form of pizza works under different rules.
Now this has become one of my favorite weekend pizzas. It feels rustic, feeds a crowd easily, and leaves plenty of room to customize every corner with different toppings. If you’ve never made focaccia pizza before, this recipe will walk you through every important step so your first slice is crisp underneath and wonderfully soft inside.
Mastering the Focaccia Pizza Crust
Traditional pizza dough is stretched thin so it bakes quickly. Focaccia dough contains more water and more olive oil, giving it a completely different texture.
Instead of aiming for a thin crust, you’re encouraging large air pockets to develop while the dough rises. Those bubbles create a light interior that stays tender even after the crust becomes deeply golden.
Olive oil also plays a bigger role than many people realize. It coats the pan, helps the bottom caramelize, and creates the crisp texture that makes focaccia pizza so satisfying. Without enough oil, the crust can stick and lose much of its signature crunch.
Avoid Mistake That Makes Focaccia Pizza Soggy
Most disappointing focaccia pizzas have one thing in common: too much moisture.
The thick dough can support plenty of cheese, but it still needs direct heat to bake all the way through. If you pour on a heavy layer of sauce or use vegetables that release lots of water, the center may stay underbaked while the cheese looks finished.
Here’s what works much better:
- Pat fresh mozzarella dry before using it.
- Spread a thin layer of sauce instead of a thick blanket.
- Cook mushrooms before adding them.
- Drain canned vegetables well.
- Keep toppings in a single layer rather than stacking them.
One trick I use often is sprinkling a little mozzarella over the dough before adding the sauce. That thin cheese layer creates a barrier that helps protect the crust from extra moisture. Similar approaches are recommended by experienced test kitchens when adapting focaccia into pizza.
Ingredients Breakdown
4 cups (500g) bread flour
Bread flour gives the dough enough strength to trap large air bubbles. The extra protein creates a pleasantly chewy bite that all-purpose flour can’t quite match.
2 teaspoons instant yeast
This lifts the dough without requiring proofing first. If your yeast has been sitting in the pantry for a long time, check the expiration date before mixing.
2 teaspoons fine sea salt
Salt isn’t only for flavor. It also strengthens gluten so the dough holds its shape during the long rise.
1¾ cups (415ml) warm water (100–110°F / 38–43°C)
Warm—not hot—water encourages yeast activity. If it feels hot on your wrist, let it cool slightly before adding it.
4 tablespoons extra-virgin olive oil, divided
Some goes into the dough, while the rest coats the pan generously. That shallow layer of oil is one of the secrets behind the crisp, golden bottom.
½ cup pizza sauce
Choose a thicker sauce rather than a watery one. If it runs off the spoon like soup, simmer it for a few minutes before using.
2 cups shredded low-moisture mozzarella
This melts evenly and browns beautifully without releasing excess liquid.
¼ cup freshly grated Parmesan cheese
A small amount adds a savory finish and helps the top develop deeper color during baking.
1 teaspoon dried oregano
Its earthy aroma pairs naturally with tomato sauce and cheese without overpowering them.
½ teaspoon garlic powder
Unlike fresh garlic, garlic powder spreads evenly across the pizza and won’t burn on the hot surface.
Fresh basil leaves (optional)
Scatter these over the hot pizza after baking instead of before. The leaves stay bright and fragrant instead of turning dark.
Smart Substitutions
- Replace bread flour with all-purpose flour. Use the same amount by weight. The crust will be slightly softer but still delicious.
- Swap instant yeast for active dry yeast. Use 2¼ teaspoons and dissolve it in the warm water for about 5–10 minutes before mixing.
- Use provolone instead of mozzarella. Replace it cup for cup, or combine half provolone and half mozzarella for extra flavor.
- No pizza sauce? Mix ½ cup crushed tomatoes with 1 tablespoon tomato paste, a pinch of oregano, and a little salt for a thicker homemade substitute.
- Replace Parmesan with Pecorino Romano. Use the same quantity, but remember Pecorino is saltier, so you may want slightly less.
- Fresh oregano instead of dried. Use about 1 tablespoon chopped fresh oregano for every 1 teaspoon dried.
How to Make Crispy Focaccia Pizza
Step 1: Mix the Dough
In a large mixing bowl, combine the bread flour, instant yeast, salt, warm water, and 2 tablespoons of olive oil. Stir until no dry flour remains. The dough will look sticky and shaggy—that’s exactly what you want. Resist the urge to add more flour.
The dough should cling to the sides of the bowl but still feel soft and stretchy.
Visual cue: It should resemble thick cake batter at first, then slowly pull together into one sticky mass.
Common mistake: A stiff dough won’t create the large air pockets that make focaccia light.
Step 2: Let the Dough Rise
Cover the bowl with plastic wrap or a clean kitchen towel. Leave it in a warm spot for 2 to 3 hours, or until doubled in size.
As it rises, you’ll notice bubbles forming throughout the dough. Those bubbles are a good sign that the yeast is doing its job.
Visual cue: The dough should look puffy, airy, and jiggle slightly when you gently shake the bowl.
Common mistake: Don’t rush the rise. Under-proofed dough bakes up dense instead of airy.
Step 3: Prepare the Pan
Pour the remaining 2 tablespoons of olive oil into a 9×13-inch metal baking pan. Spread it generously across the bottom and into the corners.
Transfer the dough into the pan. Gently stretch it toward the edges without forcing it. If it springs back, let it rest for 10 minutes before trying again.
Visual cue: The bottom of the pan should have a visible coating of oil. That oil creates the crisp, golden crust during baking.
Don’t skip this part. Many home bakers use too little oil, and the crust misses its signature crunch.
Step 4: Second Rise and Dimple the Dough
Cover the pan and let the dough rise for another 45 to 60 minutes.
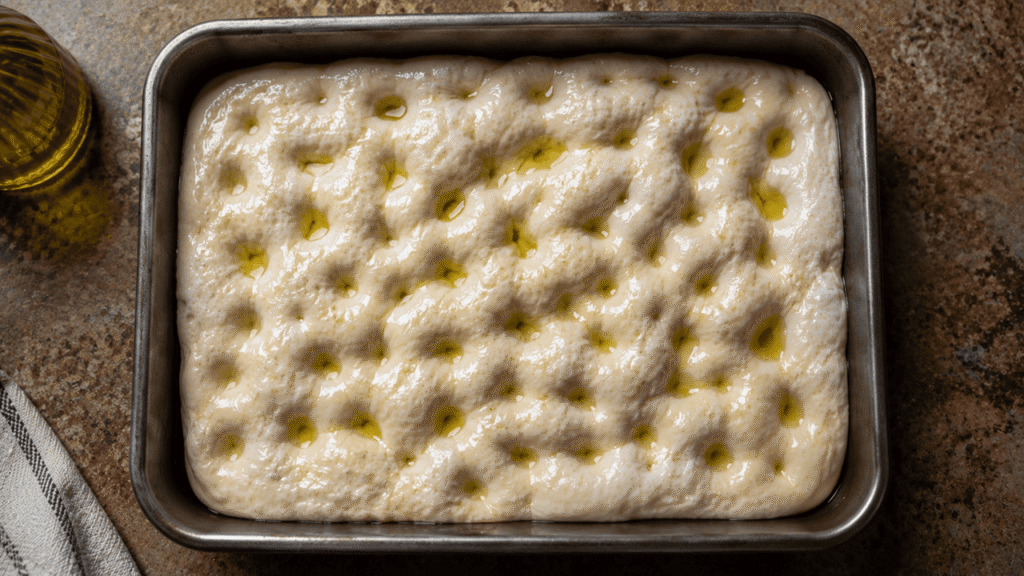
Once it’s puffy, drizzle a little extra olive oil over the surface. Dip your fingertips into the dough and press straight down to create deep dimples across the top.
Those dimples aren’t just decorative. They help hold the sauce and toppings while keeping the dough from rising unevenly.
Visual cue: The dough should slowly spring back while the dimples remain visible.
Common mistake: Press confidently. Shallow dimples often disappear during baking.
Step 5: Add the Sauce
Spread the pizza sauce gently over the surface, leaving about a ½-inch border around the edges.
Keep the layer thin and even. A little sauce goes a long way on thick focaccia.
Visual cue: You should still see the dimples through the sauce.
This is the step people rush. A heavy blanket of sauce traps moisture and can leave the center soft instead of crisp.
Step 6: Top with Cheese and Seasonings
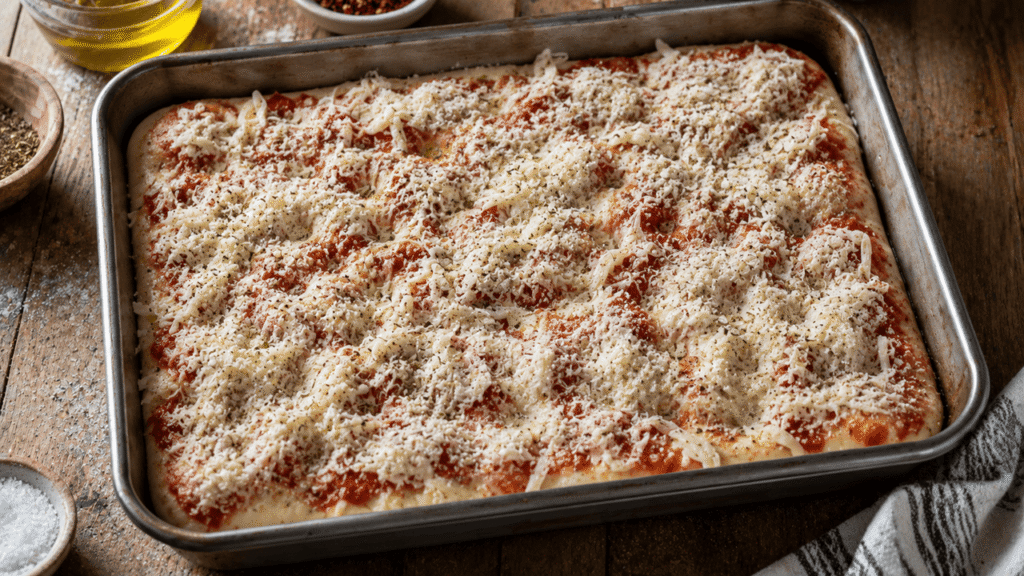
Sprinkle the mozzarella evenly over the sauce. Finish with Parmesan, oregano, and garlic powder.
If you’re adding vegetables, meats, or other toppings, keep them in a single layer. Overloading the pizza prevents heat from reaching the crust efficiently.
Visual cue: Every bite should have toppings without completely hiding the cheese underneath.
Common mistake: Fresh mozzarella should be patted dry first so excess moisture doesn’t seep into the crust.
Step 7: Bake Until Deep Golden
Bake in a preheated 425°F (220°C) oven for 20–28 minutes.
Rotate the pan halfway if needed. For extra-crispy bottom, use a baking steel/stone or place on lowest rack; reduce to 400°F if top browns too fast.” (Aligns with common 15–30 min range at 425–475°F.)
Visual cue: Carefully lift one corner with a spatula. The bottom should be crisp, evenly browned, and release easily from the pan.
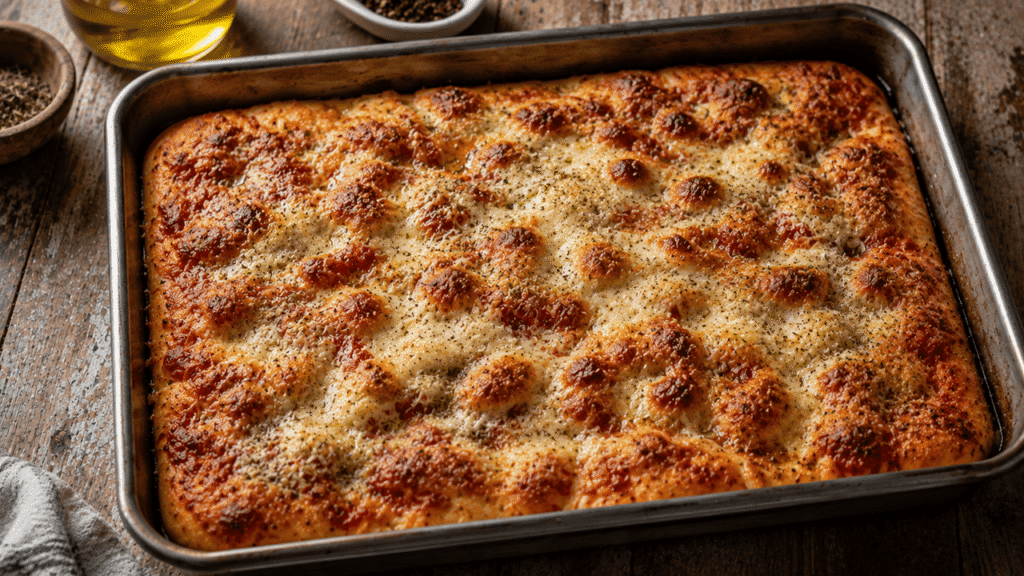
If the top browns before the bottom crisps, move the pan to the lowest oven rack for the last few minutes.
Step 8: Cool Before Slicing
Transfer the pizza to a wire rack and let it cool for 5 to 10 minutes before cutting.
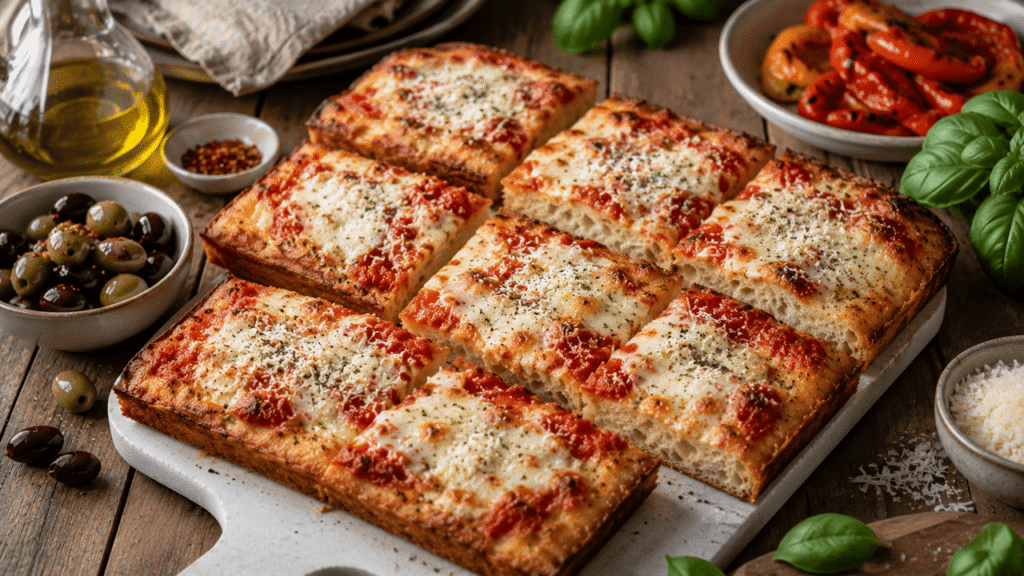
This short rest allows steam to escape so the bottom stays crisp instead of softening inside the hot pan.
Scatter fresh basil over the top just before serving.
Visual cue: The crust should sound lightly crisp when tapped, while the center remains soft and airy.
Common mistake: Leaving the pizza in the pan after baking traps steam underneath and softens the crust.
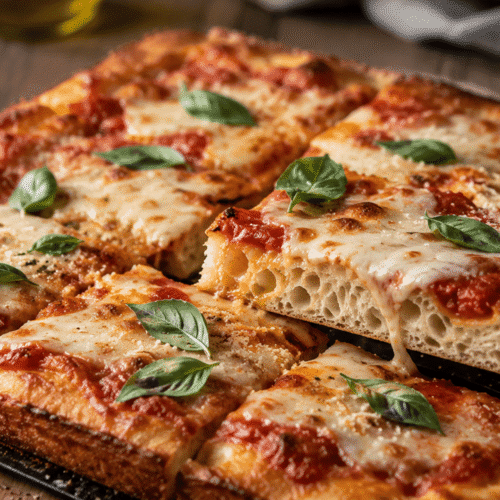
Crispy Focaccia Pizza Recipe

Equipment
- Large mixing bowl
- Measuring cups and spoons
- Digital kitchen scale (recommended)
- Rubber spatula
- 9×13-inch metal baking pan
- Plastic wrap or clean kitchen towel
- Wire cooling rack
- Pizza Cutter
Ingredients
For the Dough
- 4 cups 500g bread flour
- 2 teaspoons instant yeast
- 2 teaspoons fine sea salt
- 1¾ cups (415ml) warm water (100–110°F / 38–43°C)
- 4 tbsp extra-virgin olive oil, divided
For the Topping
- ½ cup thick pizza sauce
- 2 cups shredded low-moisture mozzarella
- ¼ cup grated Parmesan cheese
- 1 teaspoon dried oregano
- ½ teaspoon garlic powder
- Fresh basil leaves for garnish (optional)
Instructions
- Mix the flour, yeast, salt, warm water, and 2 tablespoons olive oil until a sticky dough forms.
- Cover and let the dough rise for 2 to 3 hours, or until doubled in size.
- Coat a 9×13-inch metal baking pan generously with the remaining olive oil.
- Transfer the dough to the pan and gently stretch it toward the edges. Let it rest if it resists stretching.
- Cover and let the dough rise again for 45 to 60 minutes.
- Preheat the oven to 425°F (220°C).
- Drizzle a little olive oil over the dough and press deep dimples across the surface with your fingertips.
- Spread the pizza sauce evenly, leaving a small border around the edges.
- Top with mozzarella, Parmesan, oregano, and garlic powder.
- Bake for 20–25 minutes, rotating the pan halfway if needed, until the cheese is bubbling and the crust is deep golden.
- Transfer the pizza to a wire rack and let it rest for 5 to 10 minutes.
- Garnish with fresh basil, slice into squares, and serve warm.
Notes
- Bread flour creates a chewier, airier crust than all-purpose flour.
- A generous coating of olive oil underneath the dough is the key to a crispy bottom.
- Don’t overload the pizza with sauce or watery vegetables.
- Pat fresh mozzarella dry before using it.
- For even more flavor, refrigerate the dough overnight after mixing and bake it the following day.
- Refrigerate leftovers within 2 hours of baking and reheat leftovers to 165°F (74°C) before serving for food safety.
Specific Serving Suggestions
This thick, chewy pizza is filling enough to be the main event, but a few simple sides make it feel like a complete meal.
- Serve with warm marinated olives for a Mediterranean-style appetizer.
- Pair it with garlic butter-roasted mushrooms for extra savory flavor.
- A bowl of creamy tomato soup turns it into a comforting lunch on cool days.
- Add a plate of roasted peppers and zucchini for color and sweetness without making the meal heavy.
- Finish with fresh basil, grated Parmesan, and a drizzle of good olive oil just before serving.
- For a casual gathering, cut the pizza into 6–12 squares depending on appetite)” or keep 8 but note flexibility. Serve alongside an antipasto platter with cured meats, cheeses, and pickled vegetables.
Storage and Reheating
Refrigerator
Allow the pizza to cool completely, then store slices in an airtight container or wrap them well. Refrigerate within 2 hours of baking and enjoy within 3–4 days.
Freezer
Wrap individual slices tightly in plastic wrap, then place them in a freezer-safe bag or container. Freeze for up to 2 months for the best texture, though frozen leftovers remain safe longer if continuously frozen.
Best Way to Reheat
Preheat your oven or toaster oven to 375°F (190°C). Place the slices directly on the oven rack or a preheated baking sheet and heat for 8–10 minutes, until the cheese is hot and the crust turns crisp again.
Air Fryer
Heat at 350°F (175°C) for 3–5 minutes. This method brings back the crisp edges surprisingly well.
Skillet Method
Warm a slice in a nonstick skillet over medium-low heat for 3–4 minutes. Add a few drops of water to the pan away from the pizza, then cover with a lid for about a minute. The steam warms the toppings while the pan keeps the bottom crisp.
Microwave
A microwave is the fastest option, but it softens the crust. If you use one, heat only until hot, then finish the slice in a skillet for a minute to restore some crispness.
Frequently Asked Questions
Why is my focaccia pizza dough dense instead of light and airy?
A dense crust usually means the dough didn’t have enough time to rise or too much flour was added during mixing. Focaccia dough should be quite sticky at first. As it proofs, it develops the large air pockets that give the finished pizza its soft, open crumb. Give the dough enough time to double in size before shaping it, and avoid adding extra flour unless it’s absolutely necessary.
What’s the difference between focaccia pizza and regular thick-crust pizza?
Although they look similar, the dough is quite different. Focaccia dough contains more water and olive oil, creating a lighter, airier interior with a crisp, almost fried bottom. Thick-crust pizza is usually firmer and chewier because it’s designed to hold more toppings without developing the same open crumb.
Can I prepare focaccia pizza dough the night before?
Yes, and I often do. After mixing the dough, cover it tightly and let it rise slowly in the refrigerator overnight. The longer, colder fermentation develops a richer flavor and makes the dough easier to handle the next day. Let it sit at room temperature for about 30 to 60 minutes before stretching it into the pan.
How do I keep the bottom of focaccia pizza crispy after baking?
The easiest trick is to move the baked pizza onto a wire rack as soon as it comes out of the oven. Leaving it in the hot pan traps steam underneath and softens the crust. Reheating leftovers in the oven or air fryer instead of the microwave also helps restore the crisp texture.
Is it okay to freeze baked focaccia pizza?
Absolutely. Let the pizza cool completely, wrap individual slices well, and freeze them for up to 2 months for the best quality. Reheat directly from frozen in a hot oven until the cheese is bubbly and the crust turns crisp again.
Why does my cheese slide off when I cut the pizza?
This usually happens when the pizza is sliced immediately after baking. Let it rest for about 5 to 10 minutes before cutting. That short cooling time allows the melted cheese to set slightly while the steam escapes from the crust.
Can I use fresh mozzarella instead of shredded mozzarella?
Yes, but drain it well first. Fresh mozzarella contains much more moisture than low-moisture mozzarella, and that extra liquid can soften the crust. Pat the slices dry with paper towels before adding them to the pizza, and use a slightly lighter layer than you would with shredded cheese.
A Few Final Thoughts
This crispy focaccia pizza is one of those recipes I come back to whenever I want something comforting without spending all day in the kitchen. There’s something satisfying about hearing that crisp bottom when you lift the first slice while the inside stays soft and airy.
I hope this recipe becomes one you’ll make again and again. If you try it, experiment with seasonal toppings and make it your own. Homemade pizza is always more fun when everyone adds their favorite flavors.
