
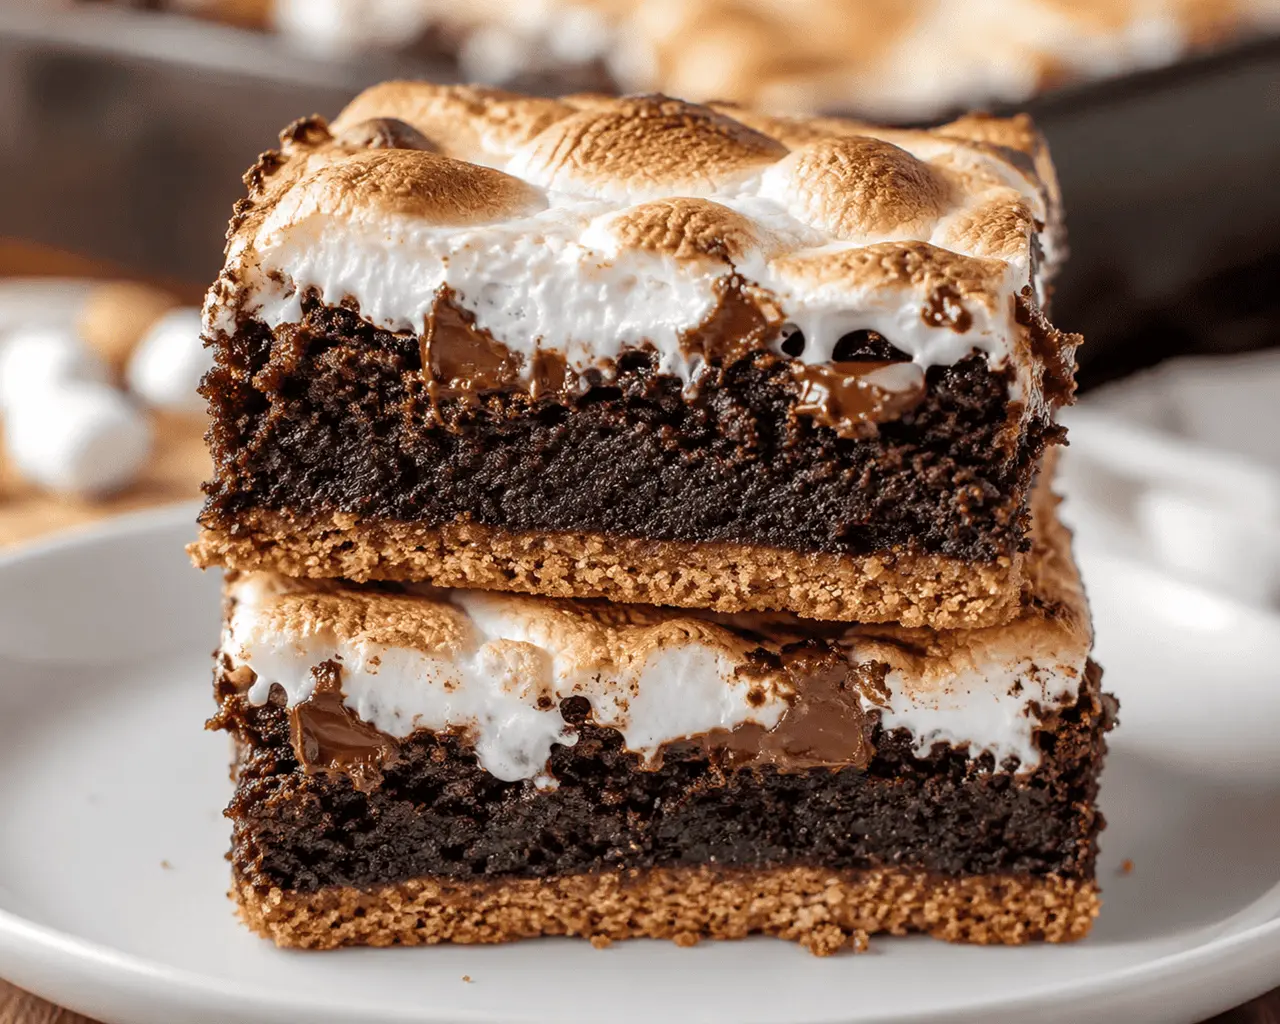
I always know these brownies will disappear quickly because someone reaches for one before they have even cooled. The toasted marshmallows separate into long, sticky strands. The chocolate is still soft. The graham cracker crust remains crisp enough to resemble a traditional campfire s’more without falling apart.
What I like most about this S’mores Brownies recipe is the contrast. You get three distinct layers in one bite. The base is buttery with a subtle crunch. The brownie is rich and chocolatey without being hefty. Then comes the toasted marshmallow on top, which is soft and slightly caramelized around the edges. Each layer has a specific purpose, and when combined, they taste just like the iconic camping delight in dessert bar shape.
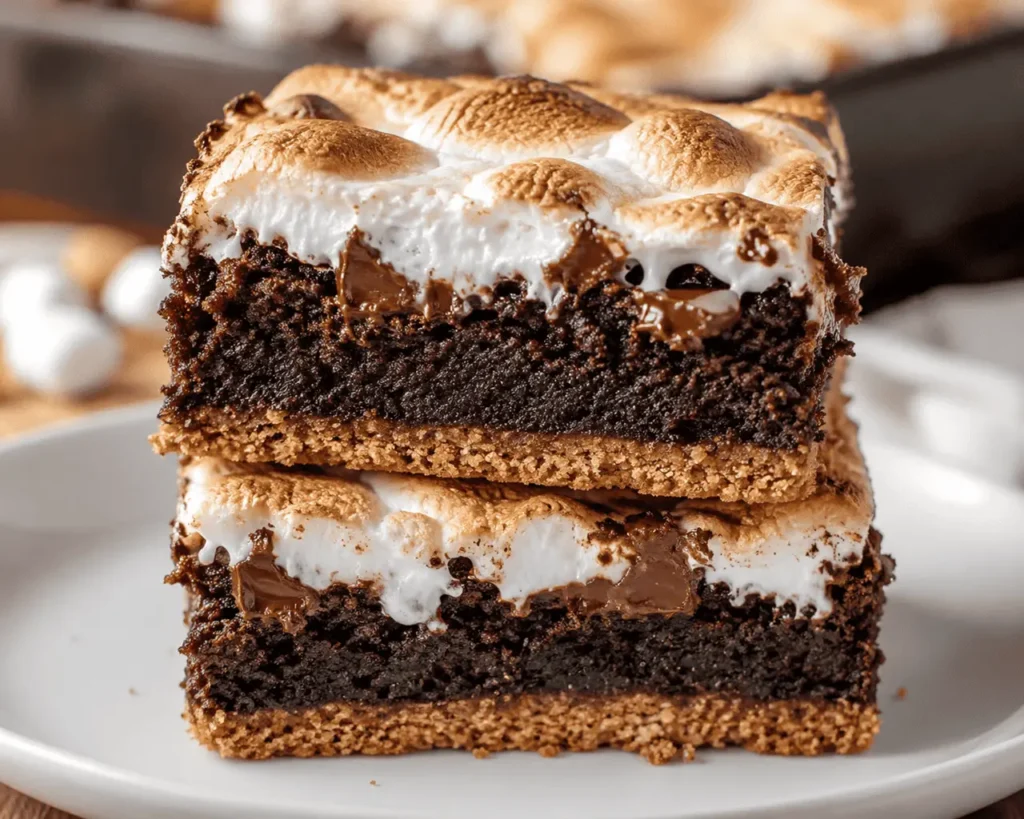
Before sharing this recipe, I experimented with different variations to determine what worked best. Pre-baking the graham cracker crust made the most impact since it remained crisp beneath the brownies rather than being squishy after cooling. I also preferred milk chocolate bars to chocolate chips for a smoother melted layer, and mini marshmallows toasted more evenly, giving each brownie the characteristic gooey s’mores topping.
How to Keep the Graham Cracker Crust Crisp Under Rich Brownies
One of the most disappointing aspects about S’mores Brownies is their sloppy crust. The fix is easy. Bake the graham cracker layer first, until it is gently brown and smells buttery. Pre-baking the crust for 8-10 minutes helps the crumbs form a firm base before adding the brownie batter on top.
I also like to press the crumbs down firmly using the bottom of a measuring cup. You don’t need to crush them with all your strength, but you do want an even layer without loose spots. If the crust is packed evenly, every brownie holds together when you lift it from the pan.
Lining your baking pan with parchment paper makes a huge difference, too. Once everything has cooled, you can lift the whole slab out in one piece before slicing. It saves the edges from breaking apart and makes serving much easier.
The Secret to Fudgy Brownies with Toasted Marshmallows
These brownies should stay soft in the middle. I pull the brownies from the oven when a toothpick still has a few moist crumbs attached, since a fully clean toothpick usually means they’ve overbaked. The first batch I ever baked, I pulled them at 35 minutes with a completely clean toothpick — they looked perfect but were noticeably drier once cooled. Now I always pull them at the moist-crumb stage, even though it feels underdone at the time. They will continue to set as they cool.
A kitchen torch is another great option — it gives you more control over the color while keeping the brownie layer from heating too much. Either method creates those lightly charred spots that make these bars taste so much like campfire s’mores.
S’mores Brownies Recipe Ingredients Breakdown
- 10 full graham cracker sheets (about 1½ cups crumbs) — These create the signature buttery base. Honey graham crackers give the closest classic s’mores flavor.
- 6 tablespoons unsalted butter, melted — Mixes with the crumbs to form a crust that slices cleanly instead of crumbling.
- 2 tablespoons granulated sugar — Just enough sweetness to help the crust brown and stay crisp.
- ¼ teaspoon fine salt — A small amount wakes up the buttery graham cracker flavor.
- ¾ cup (170g) unsalted butter — The brownie layer gets its rich texture from real butter instead of oil.
- 6 ounces (170g) semi-sweet chocolate, chopped — Use baking chocolate or a quality chocolate bar. It melts more smoothly than many chocolate chips.
- ¾ cup granulated sugar — Gives the brownies their shiny top while balancing the bitterness of cocoa.
- ½ cup light brown sugar — Adds moisture and a light caramel note that fits perfectly with graham crackers.
- 3 large eggs, room temperature — Room-temperature eggs blend into the batter more easily and help create a smooth, glossy texture.
- 2 teaspoons vanilla extract — Vanilla softens the sharp chocolate notes and ties the whole dessert together.
- ¾ cup all-purpose flour — Enough to give structure while keeping the brownies soft and fudgy.
- ¼ cup Dutch-process cocoa powder — Deepens the chocolate flavor without making the batter heavy.
- ½ teaspoon fine salt — Chocolate tastes fuller with a little salt in the mix.
- 1 cup semi-sweet chocolate chips — These melt into small pockets of chocolate throughout each brownie.
- 2 large milk chocolate bars (about 3.5 ounces total), broken into pieces — The milk chocolate bars melt just enough to recreate the familiar chocolate from a traditional s’more.
- 3 to 4 cups mini marshmallows (or 18-20 large marshmallows) — Mini marshmallows spread more evenly, while large marshmallows create dramatic gooey stretches after toasting.
S’mores Brownies Smart Substitutions
- Use digestive biscuits instead of graham crackers.
If graham crackers aren’t available, use the same amount of finely crushed digestive biscuits (1½ cups crumbs). They have a similar buttery flavor and bake into a sturdy crust. - Swap semi-sweet chocolate for dark chocolate.
Replace the chopped semi-sweet chocolate with an equal amount of 60–70% dark chocolate. The brownies will taste richer and slightly less sweet. If using very dark chocolate (70%+), add 1 tablespoon of extra sugar to balance the bitterness. - Mini marshmallows or large marshmallows both work.
Use 3–4 cups mini marshmallows or 18–20 large marshmallows, cut in half. Halved large marshmallows create a thicker topping, while minis spread more evenly across the brownies. - Milk chocolate can be replaced with chocolate chips.
Instead of chocolate bars, sprinkle ¾ cup milk chocolate chips over the brownies before adding the marshmallows. They’ll melt into a smooth layer without changing the baking time. - Dutch-process cocoa or natural cocoa powder.
Dutch-process cocoa gives a darker color and smoother chocolate flavor. Natural cocoa powder also works in a 1:1 ratio, producing a slightly brighter chocolate taste.
Step-by-Step Instructions
Step 1 – Prepare the Pan and Oven
Heat your oven to 350°F (175°C). Line an 8×8-inch baking pan with parchment paper, leaving enough overhang to lift the brownies out later. Lightly grease the parchment so nothing sticks.
Step 2 – Build the Graham Cracker Crust
Mix the graham cracker crumbs, melted butter, sugar, and salt until every crumb looks lightly coated. Press the mixture firmly into the bottom of the pan using the bottom of a measuring cup or glass. You want a flat, compact layer without loose crumbs.
Bake the crust for 8–10 minutes, until it smells buttery and the edges begin turning lightly golden. Let it cool for a few minutes while you prepare the brownie batter. Pre-baking helps the crust stay crisp under the brownie layer.
Step 3 – Melt the Chocolate
Place the butter and chopped semi-sweet chocolate in a heatproof bowl. Melt them gently over barely simmering water or in short microwave bursts, stirring after each one.
The mixture should look silky and glossy with no lumps. Let it cool for about 5 minutes so it doesn’t scramble the eggs.
Step 4 – Mix the Brownie Batter
Whisk both sugars into the melted chocolate until smooth. Add the eggs one at a time, then stir in the vanilla.
Fold in the flour, cocoa powder, and salt just until no dry streaks remain. Finally, stir in the chocolate chips.
Overmixing at this stage is the most common mistake. Stop mixing as soon as everything comes together. Too much stirring develops gluten, and that can turn fudgy brownies into firm, cake-like ones.
Step 5 – Bake the Brownies
Spread the batter gently over the cooled graham cracker crust. Smooth the top with an offset spatula so the batter reaches every corner.
Bake for 30–35 minutes. The edges should look set while the center still has a slight wobble. A toothpick inserted into the middle should come out with a few moist crumbs attached, not wet batter. That’s how you know the brownies will stay fudgy after cooling.
Step 6 – Add the Chocolate Layer
While the brownies are still warm, arrange the milk chocolate pieces across the surface. Leave small gaps because the marshmallows will spread as they heat.
The warmth from the brownies softens the chocolate slightly, helping it melt into the topping later.
Step 7 – Cover with Marshmallows
Scatter the mini marshmallows evenly over the chocolate. If you’re using large marshmallows, place the cut sides down for better coverage.
Try to cover almost the entire surface so every bite gets that classic gooey s’mores finish.
Step 8 – Toast Until Golden
Switch the oven to broil. Place the pan about 6 inches below the heating element.
Don’t walk away during this part. Marshmallows can turn from beautifully toasted to burnt in less than a minute. Watch for golden tops with a few darker toasted spots, then remove the pan immediately. A kitchen torch works just as well if you have one.
Step 9 – Cool Before Slicing
Let the brownies cool completely at room temperature, then chill them for 30–45 minutes if you want especially neat slices.
Lift the brownies from the pan using the parchment overhang. Wipe your knife clean between cuts for smooth edges. The marshmallows will stay soft while the brownie layer slices much more cleanly after resting.
S’mores Brownies Recipe

Equipment
- 8×8-inch baking pan
- Parchment paper
- Mixing bowls
- Whisk
- Rubber spatula
- Measuring cups and spoons
- Microwave-safe bowl or double boiler
- Cooling rack
- Kitchen torch (optional)
Ingredients
Graham Cracker Crust
- 10 full graham cracker sheets about 1½ cups crumbs
- 6 tablespoons unsalted butter melted
- 2 tablespoons granulated sugar
- ¼ teaspoon fine salt
Brownie Layer
- ¾ cup 170g unsalted butter
- 6 ounces semi-sweet chocolate chopped
- ¾ cup granulated sugar
- ½ cup light brown sugar
- 3 large eggs
- 2 teaspoons vanilla extract
- ¾ cup all-purpose flour
- ¼ cup Dutch-process cocoa powder
- ½ teaspoon fine salt
- 1 cup semi-sweet chocolate chips
Topping
- 2 bars milk chocolate broken into pieces
- 3-4 cups mini marshmallows or 18–20 large marshmallows
Instructions
- Preheat oven to 350°F (175°C) and line an 8×8-inch pan with parchment paper.
- Mix graham cracker crumbs, butter, sugar, and salt. Press into the pan and bake for 8–10 minutes.
- Melt butter and chopped chocolate together until smooth.
- Stir in both sugars, then whisk in eggs and vanilla.
- Fold in flour, cocoa powder, salt, and chocolate chips just until combined.
- Spread batter over the cooled crust and bake for 30–35 minutes.
- Place milk chocolate pieces over the warm brownies.
- Cover evenly with marshmallows.
- Broil for 30 seconds to 2 minutes until the marshmallows are golden brown.
- Cool completely before slicing and serving
Notes
- Make ahead: Bake the brownies one day in advance for cleaner slices and even better flavor.
- Substitution: Digestive biscuits work well if graham crackers aren’t available.
- Storage: Refrigerate leftovers in an airtight container for up to 5 days or freeze for 2 months.
- Troubleshooting: If the marshmallows become too sticky while cutting, chill the brownies for 30 minutes and lightly oil the knife before slicing.
Specific Serving Suggestions
These brownies are rich enough to stand on their own, but a few simple pairings make them feel even more special.
- Serve slightly warm with a scoop of vanilla bean ice cream. The cold ice cream melts into the warm brownie for a classic hot-and-cold dessert.
- Enjoy with a glass of cold milk. The creamy milk balances the deep chocolate and sweet marshmallow.
- Pair with fresh strawberries or raspberries. Their bright flavor cuts through the richness without competing with the chocolate.
- Add a drizzle of warm chocolate sauce and a sprinkle of crushed graham crackers for a dessert worthy of birthdays or holidays.
- For coffee lovers, serve alongside a latte or cappuccino. The roasted coffee notes pair naturally with toasted marshmallows and chocolate.
S’mores Brownies Storage and Reheating
Store cooled brownies in an airtight container at room temperature for up to 2 days. If your kitchen is warm, refrigerate them instead.
For longer storage, keep them in the refrigerator for up to 5 days. Place parchment paper between layers to prevent the marshmallows from sticking.
Freeze individual brownies by wrapping each piece tightly in plastic wrap and placing them in a freezer-safe container. They’ll keep well for up to 2 months. Thaw overnight in the refrigerator before serving.
To reheat, microwave a brownie for 10–15 seconds until the chocolate softens and the marshmallow becomes gooey again. For a lightly crisp top, warm it in a 300°F (150°C) oven for about 5 minutes.
Frequently Asked Questions
Why did my S’mores Brownies turn out cakey instead of fudgy?
This usually comes down to one of two things: overmixing the batter or baking it too long. Once you add the flour, stir only until the dry streaks disappear. Bake until a toothpick comes out with a few moist crumbs instead of completely clean. The brownies will continue setting as they cool, which keeps the center rich and fudgy.
Can I use a boxed brownie mix for S’mores Brownies?
Yes, and it works surprisingly well when you’re short on time. Prepare the brownie mix according to the package directions, then pour it over the pre-baked graham cracker crust. Finish with the chocolate and marshmallow topping just like this recipe. Homemade batter has a richer flavor, but a quality boxed mix still makes delicious brownies.
How do I keep the marshmallows from burning?
This depends a lot on your oven’s broiler wattage — older ovens with a weaker broiler may need closer to 2 minutes, while newer high-output broilers can toast marshmallows in under 30 seconds. If you’re unsure which you have, do a test run with just 3–4 marshmallows first so you can calibrate timing before committing the whole pan.
Why is my graham cracker crust falling apart?
Usually this means the crumbs weren’t packed tightly enough before baking, or the mixture had too much loose butter pooling at the edges. If your crust crumbles even after pressing firmly, try reducing the butter by 1 tablespoon next time — too much fat can prevent the crumbs from binding as they cool.
Can I make S’mores Brownies a day ahead?
Absolutely. In fact, I often do because the brownies slice more neatly after they’ve rested overnight. Store them in an airtight container and, if you want freshly toasted marshmallows, you can briefly torch the top just before serving.
Can I make S’mores Brownies in a 9×13 pan instead?
Yes. Double all of the ingredients and bake the brownies in a parchment-lined 9×13-inch pan. Because baking times can vary depending on your pan, oven, and batter depth, begin checking for doneness a little earlier than you expect. The brownies are ready when the edges look set and a toothpick inserted near the center comes out with a few moist crumbs rather than wet batter. If needed, continue baking for a few more minutes and check again.
Conclusion:
The first time I made these for a family cookout, they were gone in under ten minutes — faster than anything else on the table, including the actual s’mores over the fire pit. If you try them, I’d love to know in the comments whether you went with the torch or the broiler for toasting, and how it turned out.
