
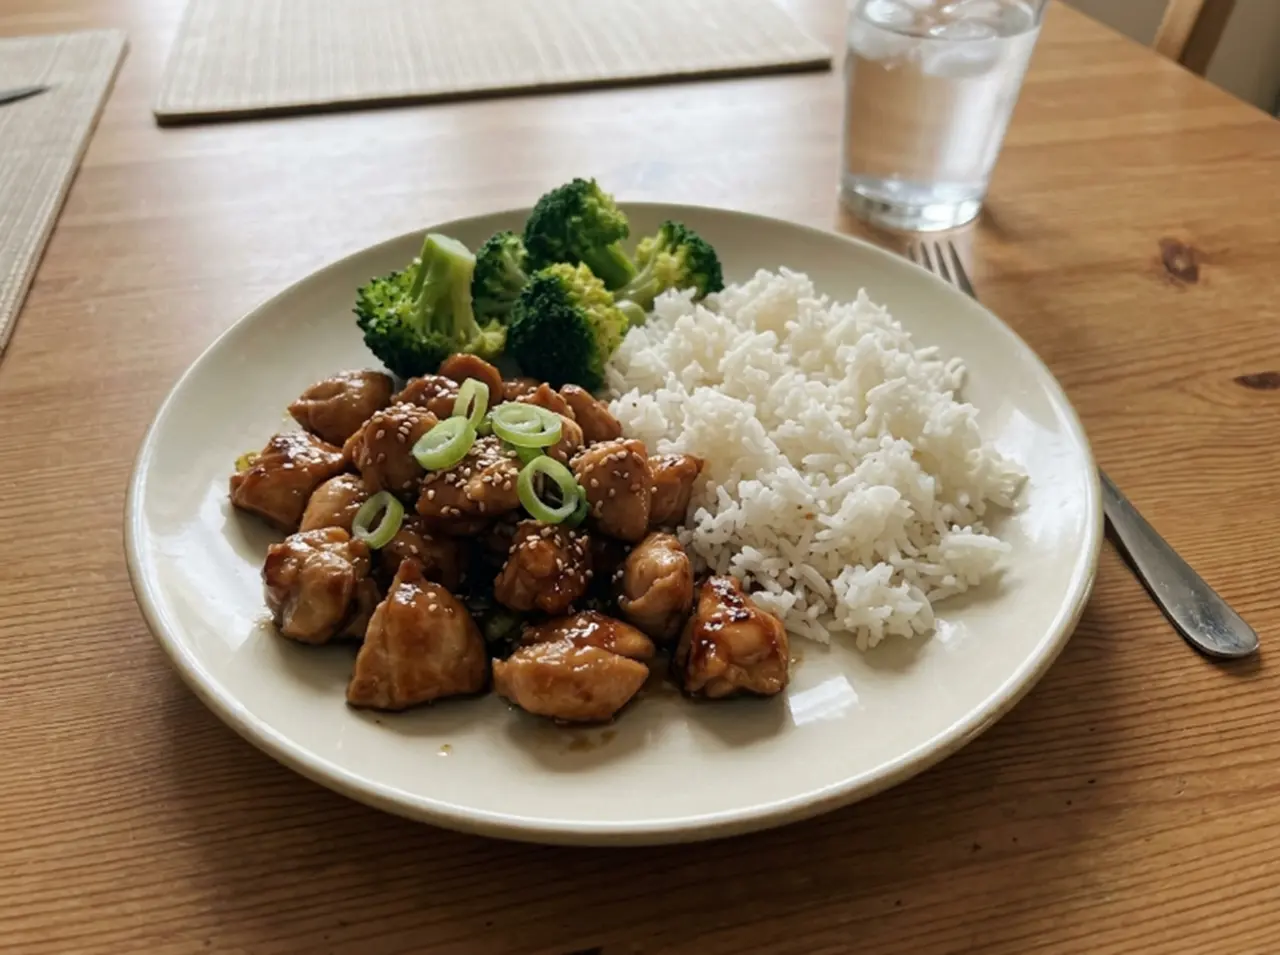
This Teriyaki chicken recipe has gained a regular spot in my supper rotation since it delivers a lot of flavor without taking up much time. To prepare a great meal, all you need is a hot skillet, a few cupboard ingredients, and a bag of chicken. As the sauce cooks, it transforms from thin and salty to a thick glaze that adheres to each piece of chicken. The glossy finish is what makes this meal so appealing.
After testing this recipe with both chicken thighs and chicken breasts, I kept coming back to boneless thighs because they stayed noticeably juicier and developed deeper golden edges during searing. I also found that fresh garlic and ginger gave the sauce a brighter, cleaner flavor than bottled versions.
It takes about 25 minutes start to finish, which is why it’s replaced takeout in my house on weeknights.. The first time I made it, I over-reduced the sauce and ended up with something closer to candy glaze — now I pull the pan off the heat the second it coats the back of a spoon, and that one change fixed it every time since.
Why Chicken Thighs Make Better Teriyaki Chicken
I almost always make teriyaki chicken with boneless, skinless chicken thighs. They have a little more fat than chicken breasts, which helps them stay juicy while they brown in the skillet. In my testing, they also developed deeper caramelized edges, which melted into the sauce and gave the finished glaze even more flavor. That extra richness pairs beautifully with the sweet and savory glaze, making every bite more satisfying.
That doesn’t mean you can’t use chicken breasts. They’re a great option if you prefer leaner meat. Just reduce the cooking time by a couple of minutes and check the internal temperature early. Chicken breast can go from juicy to dry very quickly, while thighs give you a little more flexibility.
How to Get a Thick, Glossy Teriyaki Sauce
One of the things I love most about homemade teriyaki chicken is the shiny glaze that coats every piece. The secret isn’t using lots of cornstarch. It’s letting the sauce simmer long enough to reduce naturally before adding a small slurry if it still needs help. Traditional teriyaki gets its signature shine from reducing soy sauce, mirin, sake, and sugar, while many home-style recipes finish with a little cornstarch for a slightly thicker glaze.
Keep the heat at a gentle simmer instead of a rolling boil. As the sauce cooks, it will darken slightly and become glossy enough to coat the back of a spoon. If it still looks thin after a few minutes, stir in the cornstarch slurry and cook for about a minute more.
Timing the final minute matters more than any ingredient in this recipe — more on that in Step 6
Teriyaki Chicken Recipe Ingredients Breakdown
- 1½ pounds boneless, skinless chicken thighs – They stay juicy and develop deep, caramelized edges as they sear.
- 1 tablespoon vegetable oil – A neutral oil lets the chicken brown without competing with the teriyaki flavors.
- ¼ teaspoon kosher salt – Use a light hand because soy sauce already adds plenty of seasoning.
- ⅛ teaspoon black pepper – Adds a gentle background warmth without standing out.
- ⅓ cup low-sodium soy sauce – The backbone of the sauce. Low-sodium soy sauce gives you more control over the final taste.
- 3 tablespoons mirin – This sweet Japanese rice wine gives the glaze its classic shine and mild sweetness. If you’re buying it for the first time, it keeps well in the refrigerator for future recipes.
- 2 tablespoons packed brown sugar – Helps balance the soy sauce while encouraging light caramelization in the pan.
- 1 tablespoon honey – Adds a softer sweetness and helps the glaze cling beautifully to the chicken.
- 2 cloves garlic, minced – Fresh garlic gives the sauce a richer aroma than garlic powder.
- 2 teaspoons freshly grated ginger – Brightens the sauce and cuts through the sweetness. Peel it with the edge of a spoon for less waste.
- 1 tablespoon rice vinegar – A small splash keeps the glaze from tasting overly sweet.
- ¼ cup water – Gives the sauce enough liquid to simmer before reducing.
- 2 teaspoons cornstarch – Mixed with water, it creates that glossy finish if your sauce needs extra thickening.
- 1 tablespoon cold water – Stir with the cornstarch to make a smooth slurry before adding it to the skillet.
- 1 teaspoon toasted sesame seeds – Sprinkle on top for a little crunch and a light nutty finish.
- 2 green onions, thinly sliced – Their fresh bite balances the rich glaze and adds color right before serving.
Smart Substitutions
- Chicken breast instead of thighs – Use an equal amount (1½ pounds). Reduce the cooking time by about 2–3 minutes so the meat stays tender.
- Honey instead of brown sugar – Replace the 2 tablespoons brown sugar with 2 tablespoons honey. The sauce will be slightly thinner, so simmer it an extra minute.
- Rice vinegar instead of mirin – Mix 3 tablespoons water + 1 tablespoon rice vinegar + 2 teaspoons sugar for every 3 tablespoons mirin. It won’t taste exactly the same, but it keeps the sweet and tangy balance.
- Tamari for soy sauce – Substitute 1:1 for a gluten-friendly option. Taste before adding extra salt since brands vary.
- Fresh ginger paste instead of grated ginger – Use 2 teaspoons. It’s a handy shortcut when fresh ginger isn’t available.
- Arrowroot starch instead of cornstarch – Replace 2 teaspoons cornstarch with 2 teaspoons arrowroot. Stir it in at the very end and avoid boiling for long, as arrowroot thickens quickly.
Step-by-Step Instructions
Step 1: Mix the Teriyaki Sauce
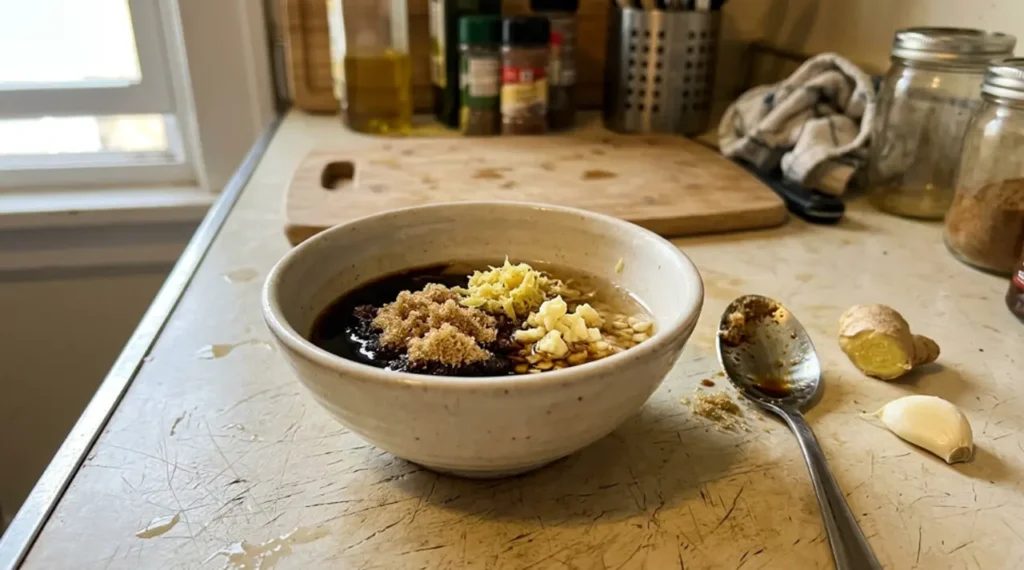
In a medium bowl, whisk together the soy sauce, mirin, brown sugar, honey, garlic, ginger, rice vinegar, and water until the sugar has mostly dissolved. The mixture will look thin at this stage, and that’s exactly what you want. Set it aside while you prepare the chicken so the garlic and ginger have a few minutes to flavor the sauce.
Step 2: Prepare the Chicken
Pat the chicken thighs dry with paper towels. This simple step helps them brown instead of steam. Season both sides lightly with salt and black pepper.
If your chicken thighs are very thick, trim away excess fat and cut them into evenly sized pieces. Similar-sized pieces cook at the same rate, so you won’t end up with some pieces overcooked while others are still underdone.
Step 3: Brown the Chicken
Heat the vegetable oil in a large skillet over medium-high heat until it shimmers. Add the chicken in a single layer without crowding the pan.
Let the chicken cook undisturbed for about 4 to 5 minutes before turning it. This is the step people rush most often. Leaving the chicken alone allows a deep golden crust to form, and those browned bits on the pan add extra flavor once the sauce goes in.
Turn the chicken and cook another 4 to 5 minutes until nearly cooked through. The outside should be nicely browned while the center is still juicy. Proper browning before glazing helps develop the rich flavor associated with teriyaki cooking.
Step 4: Add the Sauce
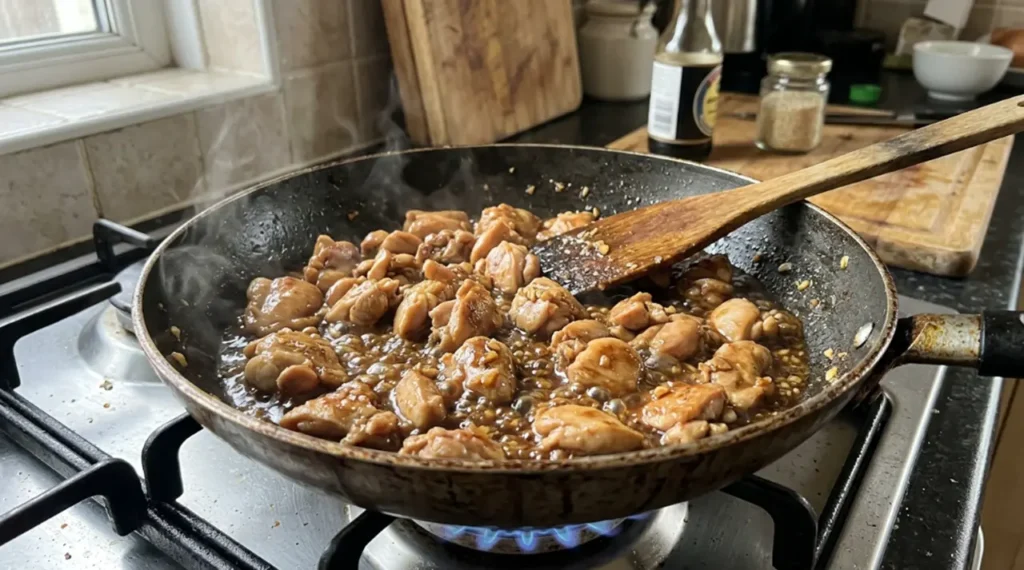
Reduce the heat to medium. Pour the prepared sauce into the skillet around the chicken instead of directly on top.
You’ll hear an immediate sizzle. Use a wooden spoon to scrape up the browned bits from the bottom of the pan as the sauce begins to simmer. Those little caramelized pieces melt into the sauce and deepen the flavor.
After a few minutes, the sauce will start smelling sweet, savory, and slightly garlicky.
Step 5: Thicken the Glaze
Stir the cornstarch with the cold water until smooth, then slowly pour it into the simmering sauce while stirring constantly.
Within about a minute, the sauce will change from thin to glossy. It should coat the back of a spoon and slowly drip off instead of running like water.
I’ve tested this sauce with the full 2 teaspoons of cornstarch and with half that amount plus an extra 2 minutes of simmering. The half-cornstarch version held up better as leftovers — the full-cornstarch version turned slightly gluey after a night in the fridge. If you’re meal-prepping, go with 1 teaspoon cornstarch and the longer simmer instead.
Step 6: Finish and Garnish
Turn the chicken several times so every piece is coated with the shiny glaze. Cook for another minute, just until everything is evenly covered.
Remove the skillet from the heat right away. Sprinkle with toasted sesame seeds and sliced green onions. The fresh onions add a little crunch and brighten the rich sauce.
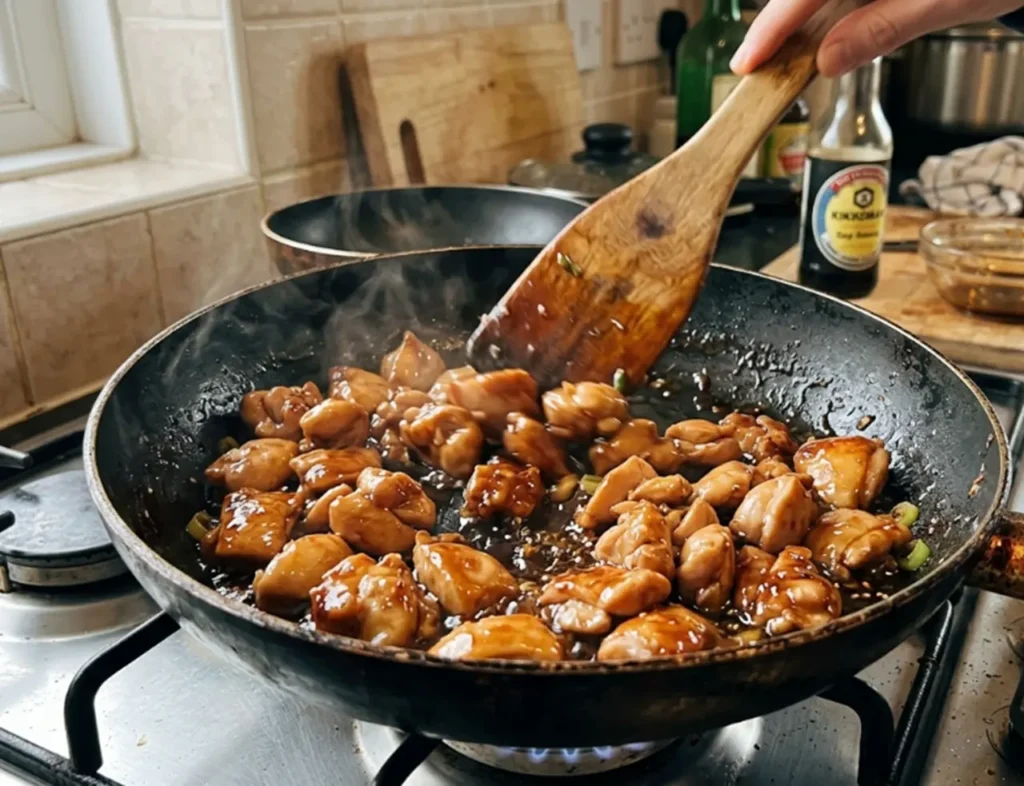
Serve while the glaze is still warm and glossy.
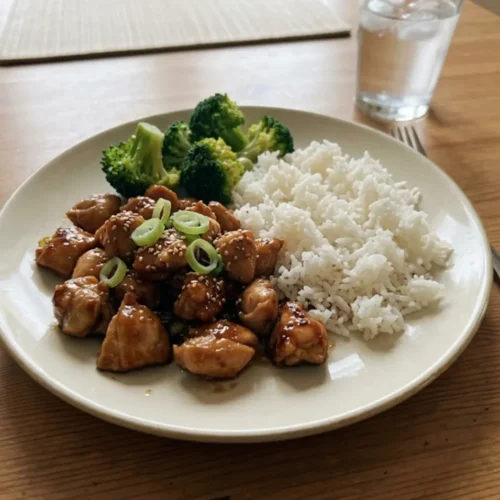
Teriyaki Chicken Recipe

Equipment
- Large nonstick or stainless-steel skillet
- mixing bowl
- Measuring cups and spoons
- Wooden spoon or silicone spatula
- Knife and cutting board
Ingredients
- 1½ pounds boneless skinless chicken thighs
- 1 tablespoon vegetable oil
- ¼ teaspoon kosher salt
- ⅛ teaspoon black pepper
- ⅓ cup low-sodium soy sauce
- 3 tablespoons mirin
- 2 tablespoons packed brown sugar
- 1 tablespoon honey
- 2 cloves garlic minced
- 2 teaspoons freshly grated ginger
- 1 tablespoon rice vinegar
- ¼ cup water
- 2 teaspoons cornstarch
- 1 tablespoon cold water
- 1 teaspoon toasted sesame seeds
- 2 green onions sliced
Instructions
- Whisk together the soy sauce, mirin, brown sugar, honey, garlic, ginger, rice vinegar, and water.
- Pat the chicken dry and season lightly with salt and pepper.
- Heat the oil in a large skillet over medium-high heat.
- Brown the chicken for 4–5 minutes per side until nearly cooked through.
- Reduce the heat to medium, then pour the sauce into the skillet and bring it to a gentle simmer
- Mix the cornstarch with cold water and stir it into the sauce.
- Cook for about 1 minute until the sauce becomes glossy and lightly thickened.
- Turn the chicken to coat it evenly in the glaze.
- Garnish with sesame seeds and sliced green onions.
- Serve immediately with steamed rice and vegetables.
Notes
- Make Ahead: Mix the sauce up to 3 days ahead and refrigerate until ready to cook.
- Substitution: Chicken breast can replace thighs, but reduce the cooking time slightly to keep it tender.
- Storage: Refrigerate leftovers in an airtight container for up to 4 days or freeze for up to 3 months.
- Troubleshooting: If the glaze becomes too thick, stir in 1–2 tablespoons of water over low heat until it loosens to a silky consistency.
Teriyaki Chicken Specific Serving Suggestions
Teriyaki chicken pairs well with simple sides that soak up the extra sauce without competing with its sweet and savory flavor.
- Steamed jasmine rice is my first choice. The fluffy grains catch every bit of the glossy glaze.
- Japanese short-grain rice gives the meal a more traditional feel because its slightly sticky texture holds the sauce beautifully.
- Steamed broccoli adds freshness and balances the richness of the chicken.
- Garlic sesame green beans provide a little crunch and a mild nutty flavor.
- Roasted carrots become naturally sweet in the oven, making them a great match for the soy-based glaze.
- Stir-fried bok choy cooks in just a few minutes and adds color to the plate.
- Vegetable fried rice turns this into a complete one-pan dinner without much extra work.
- For a lighter meal, spoon sliced teriyaki chicken over shredded cabbage, cucumbers, carrots, and edamame to make a simple rice bowl.
Storage and Reheating
Allow the teriyaki chicken to cool before storing.
- Refrigerator: Store in an airtight container for up to 4 days.
- Freezer: Freeze in a freezer-safe container for up to 3 months. Thaw overnight in the refrigerator before reheating.
Reheating on the Stove
Place the chicken and sauce in a skillet over medium-low heat. Add 1 to 2 tablespoons of water if the glaze has become too thick. Heat for about 5 minutes, stirring occasionally.
Reheating in the Microwave
Transfer a serving to a microwave-safe dish and cover loosely. Heat at 50% power in 30-second intervals, stirring between each interval until hot. Lower power helps keep the chicken tender instead of drying it out.
Avoid boiling the leftovers for several minutes because the sugars in the glaze can continue reducing and become overly salty.
Frequently Asked Questions
Can I use chicken breast instead of chicken thighs?
Yes. Chicken breast works well if that’s what you have on hand. Cut it into evenly sized pieces and reduce the cooking time slightly since breast meat cooks faster and can dry out if left in the pan too long.
Why is my teriyaki sauce too thin?
The sauce usually needs another minute or two of simmering before it thickens. If it still looks watery, make a small cornstarch slurry using 1 teaspoon cornstarch mixed with 2 teaspoons cold water and stir it into the simmering sauce. Remember that the glaze also thickens a little as it cools.
Why did my teriyaki sauce become too thick?
This usually happens when the sauce cooks too long after it reaches the right consistency. Stir in a tablespoon of water at a time over low heat until the glaze loosens. Next time, remove the skillet from the heat as soon as the sauce lightly coats the chicken instead of continuing to reduce it.
Can I make teriyaki chicken ahead of time?
Yes. You can mix the sauce up to 3 days in advance and keep it in the refrigerator in a sealed jar. Cook the chicken just before serving for the freshest texture, or fully cook the dish and refrigerate it for up to 4 days if you’re meal prepping.
Do I have to marinate the chicken?
Not for this recipe. The sauce has plenty of flavor, and it coats the chicken while it cooks.
If you have extra time, you can marinate the chicken in half of the sauce for 30 minutes to 2 hours. Avoid marinating much longer because the soy sauce can start changing the texture of the meat, making it firmer than you want.
Is homemade teriyaki sauce better than bottled?
I think so. Homemade sauce lets you control the sweetness, saltiness, and thickness. Fresh garlic and ginger also give it a brighter flavor that bottled sauces often lack.
Another bonus is that you know exactly what’s in it. Many store-bought sauces contain extra sodium, preservatives, or thickeners that aren’t needed when you’re making it from scratch.
What vegetables go well with teriyaki chicken?
Simple vegetables work best because they don’t compete with the rich glaze.
Some of my favorites include:
- Broccoli
- Bok choy
- Snap peas
- Green beans
- Carrots
- Bell peppers
- Steamed edamame
A mix of steamed vegetables also turns this into an easy rice bowl that’s filling without much extra work.
Can I bake the chicken instead of cooking it in a skillet?
Yes. Bake the seasoned chicken at 400°F (200°C) for about 20 to 25 minutes, or until it reaches an internal temperature of 165°F (74°C). While it bakes, simmer the sauce on the stovetop.
Once the chicken is cooked, toss it in the warm glaze before serving. This keeps the sauce glossy instead of drying out in the oven.
How do I know when the chicken is fully cooked?
The safest way is to use an instant-read thermometer. The thickest part of the chicken should reach 165°F (74°C).
If you don’t have a thermometer, slice into the largest piece. The meat should be opaque all the way through, and the juices should run clear instead of pink.
Conclusion:
Homemade teriyaki chicken is one of those dinners that proves simple ingredients can produce restaurant-quality results. After making this recipe many times, I’ve found that a good sear, a short simmer, and a lightly reduced glaze make all the difference. Whether you serve it over steamed rice, vegetables, or meal-prep bowls, I hope it becomes one of those dependable recipes you return to whenever you need an easy, satisfying dinner. If you try it, I’d love to hear what sides you paired it with.
