
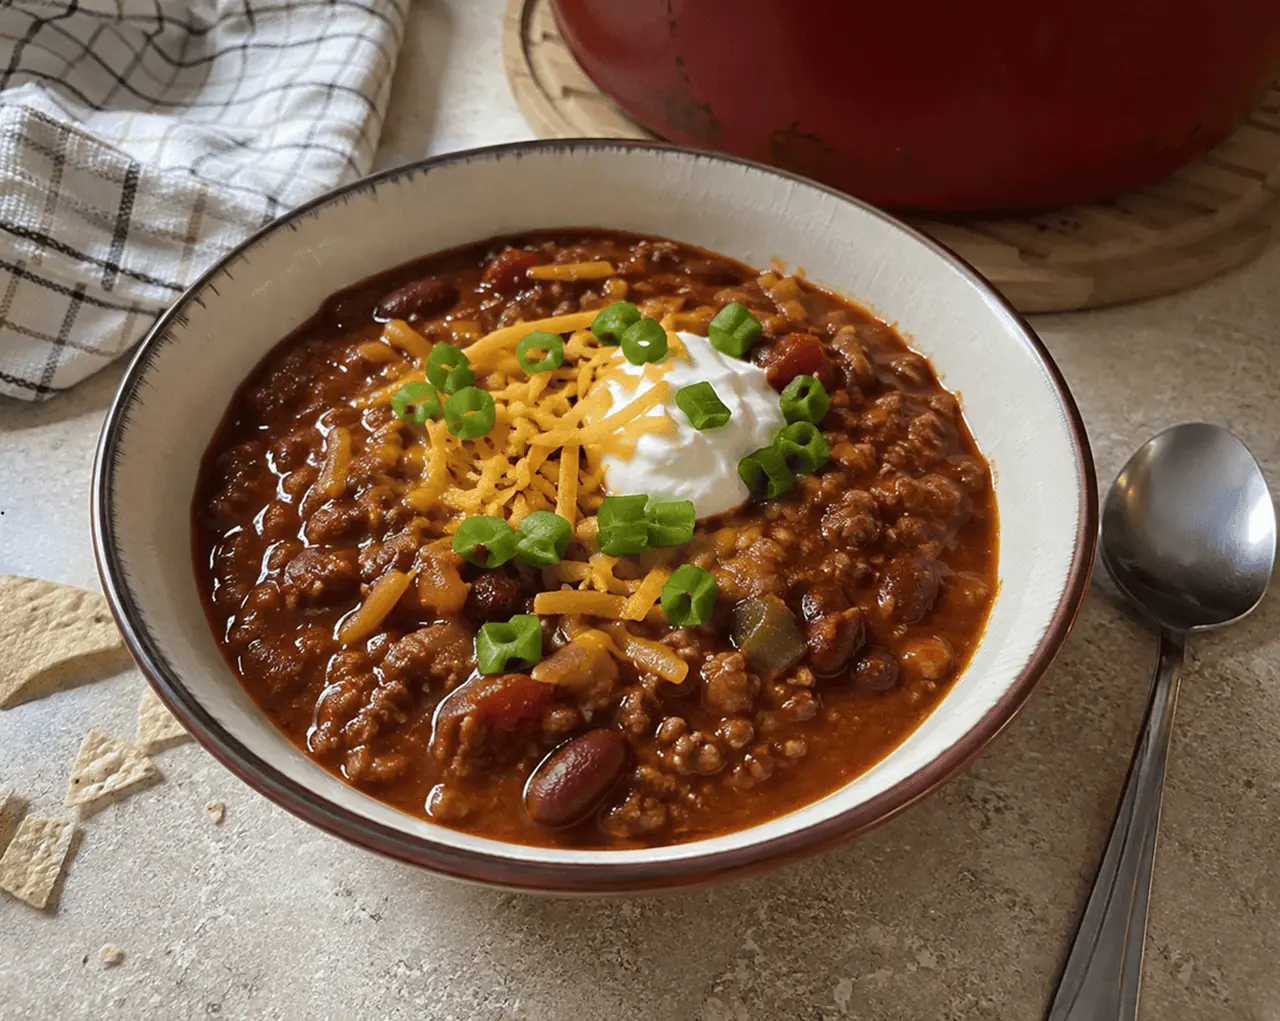
I first noticed what makes this chili different when I looked at the meat base. This Pepper Belly Pete chili doesn’t rely on ground beef alone. Ground chuck brings a rich, beefy texture, while hot breakfast sausage adds another layer of seasoning and heat. Then come the jalapeños, Hatch green chiles, tomatoes, and chili seasoning. It all goes into one big pot and slowly turns into the kind of dinner that makes the kitchen smell incredible.
I also like that this isn’t a delicate chili. It’s thick, hearty, and built for hungry people. The beans go in near the end, so they stay recognizable instead of disappearing into the sauce. The sausage fat stays in the pot, too, which gives the tomato base more richness.
I landed on this ratio after a few rounds of testing: 3 pounds of ground chuck, 1 pound of hot breakfast sausage, 44 ounces each of diced tomatoes and tomato sauce, 4 ounces of Hatch green chiles, 6 ounces of tomato paste, and three cans of chili beans. Less sausage and the chili loses its depth; more and it starts tasting more like sausage soup than chili.
Why Browning the Meat Matters for Pepper Belly Pete Chili
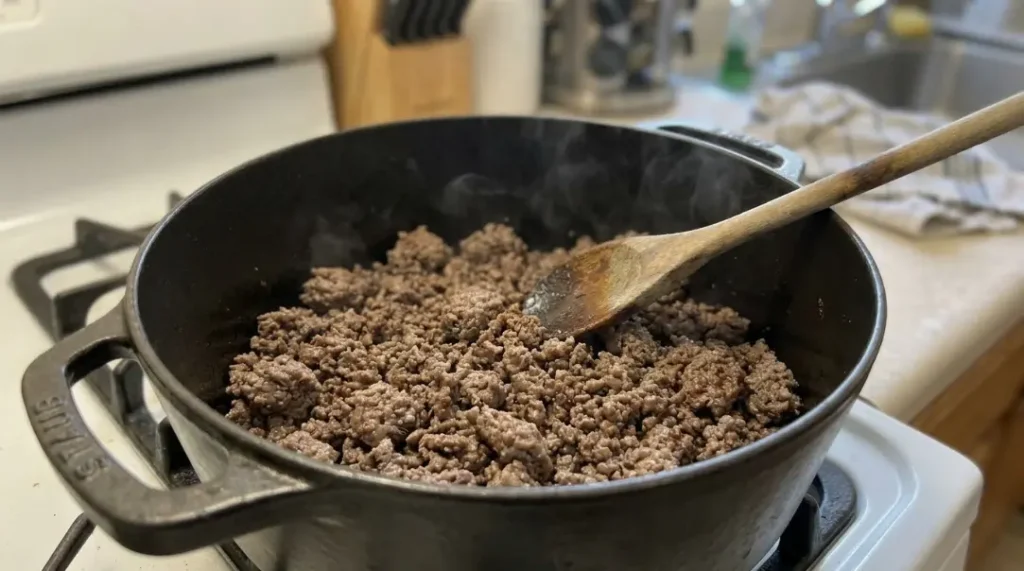
The first important step is the beef. Don’t just cook it until the pink disappears and move on. Give the ground chuck enough room in the pot to actually brown.
The browned meat leaves little bits on the bottom of the pot. Those bits become part of the chili once the tomatoes and sauce go in. The first time I made this I threw all 3 pounds in at once — it steamed instead of browning, and the chili never developed that deeper, caramelized flavor. Now I work in two batches if the pot looks crowded
I drain the ground chuck after browning, but I don’t drain the hot breakfast sausage. The sausage fat carries a lot of flavor into the onion, jalapeño, and garlic mixture. That small difference helps keep the chili rich without leaving the whole pot overly greasy.
The second technique that matters is the simmer. Keep it gentle. You want small bubbles around the edges, not a hard boil. A hard boil can make the chili splatter, cook off too much liquid, and leave the meat with a firmer texture.
Getting the Right Thick Texture in Pepper Belly Pete Chili
Because the Pepper Belly Pete chili leans on a large tomato base, the final simmer matters more than it would in a thinner chili. The first hour happens covered. Covering the pot for that first hour lets the meat, peppers, tomatoes, and seasoning cook together without losing too much liquid.
The beans go in afterward. I prefer to add them later because they don’t need a long cooking time. I tested adding the beans earlier, at the same time as the tomatoes — they broke down and went mushy by the time the chili was done. Adding them after the first hour is what keeps them intact. The final uncovered simmer, meanwhile, is what lets excess moisture escape and thickens the sauce.
Watch the pot during those last 30 minutes. If the chili is already very thick, lower the heat. If it still looks loose, leave the lid off and give it a little more time.
You want a spoonful that sits together instead of running across the bowl like soup.
Pepper Belly Pete Chili Ingredients
- 3 pounds ground chuck: Ground chuck is what gives the chili its main beefy flavor and a juicy, hearty texture. I like an 80/20 ground beef blend when available.
- 1 pound hot breakfast sausage: The sausage adds pork flavor, seasoning, and extra heat. Keep the rendered fat in the pot.
- 1 large onion, diced: Onion brings sweetness and gives the meat mixture a softer texture as it cooks.
- 3–4 fresh jalapeños, chopped: Fresh jalapeños provide adjustable heat. Remove the seeds and inner ribs if you want less heat.
- 3 cloves garlic, minced: Fresh garlic gives the pot a savory aroma that dried garlic doesn’t quite match.
- 44 ounces diced tomatoes: Canned diced tomatoes add acidity and small pieces of tomato throughout the chili.
- 44 ounces tomato sauce: Tomato sauce forms the smooth backbone here and helps create that thick, spoonable consistency.
- 4 ounces Hatch green chiles: Hatch chiles add a mild roasted pepper flavor that works especially well with the jalapeños.
- 6 ounces tomato paste: Tomato paste concentrates the tomato flavor and helps the chili thicken as it cooks.
- 3 ounces Williams chili mix: Williams chili mix supplies the main seasoning. If you can’t find Williams, use a comparable chili seasoning blend.
- 3 cans Bush’s Best Chili Magic medium Campfire Style beans: These add beans plus built-in seasoning. Add them toward the end so they don’t become mushy.
Smart Substitutions
- Ground chuck → 80/20 ground beef: Use the same 3 pounds. If your beef is especially fatty, drain it well after browning.
- Hot breakfast sausage → mild breakfast sausage: Keep the same 1-pound amount. If you still want some heat, leave the jalapeño seeds in or add extra jalapeño.
- Hatch green chiles → canned diced green chiles: Use the same 4-ounce amount. Anaheim peppers also work if you have fresh ones.
- Williams chili mix → another chili seasoning blend: Start with the equivalent of 3 ounces, then taste before adding more. Different blends can vary greatly in salt and heat.
- Chili Magic beans → kidney or pinto beans: Replace the three cans with about 45 ounces of cooked beans. Drain and rinse them first, then add a little extra chili seasoning if needed.
- Fresh jalapeños → serrano peppers: Use fewer serranos because they’re usually hotter. Start with 2 and add more only after tasting.
How to Make Pepper Belly Pete Chili
Here’s exactly how I make Pepper Belly Pete chili, step by step, from browning the meat to that final thick, spoonable pot.
- Brown the Ground Chuck
Heat a large heavy-bottomed pot or Dutch oven over medium-high heat. Add the ground chuck and break it into small pieces with a wooden spoon. Cook until deeply browned and no pink remains, about 8–10 minutes.
Drain the excess beef fat, then transfer the beef to a bowl for a moment.
- Cook the Hot Sausage
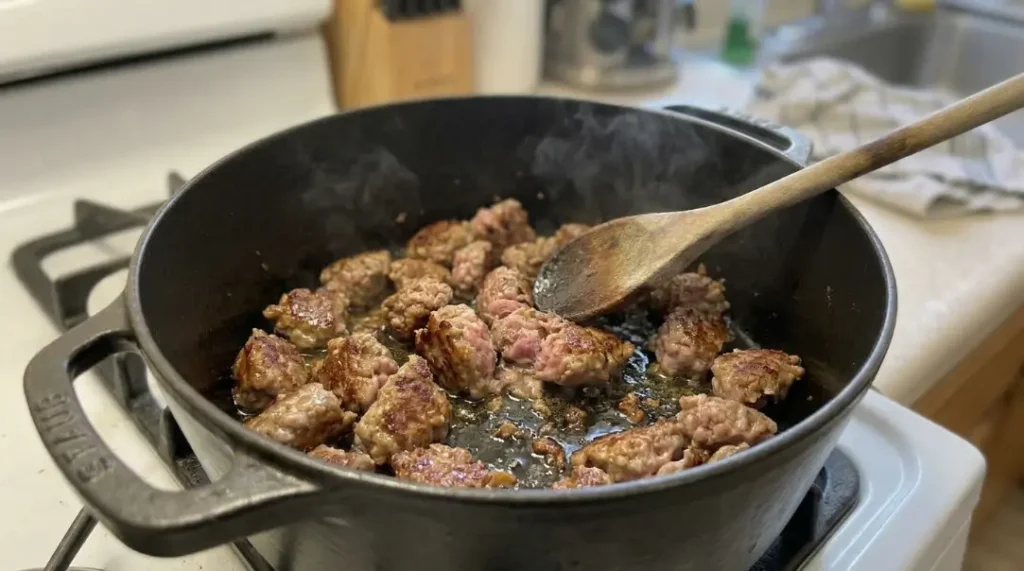
Put the same pot back over medium heat and add the hot breakfast sausage. Break it apart as it cooks. Let it brown well and leave the rendered sausage fat in the pot.
The sausage should smell savory and look browned rather than pale or steamed. This is one step where you don’t want to rush.
- Soften the Onion, Jalapeños, and Garlic
Add the diced onion, chopped jalapeños, and minced garlic to the sausage. Stir everything together and cook for about 5 minutes.
The onion should soften and turn slightly translucent. The garlic should smell strong, but don’t let it turn dark brown or it can become bitter.
- Build the Tomato Base
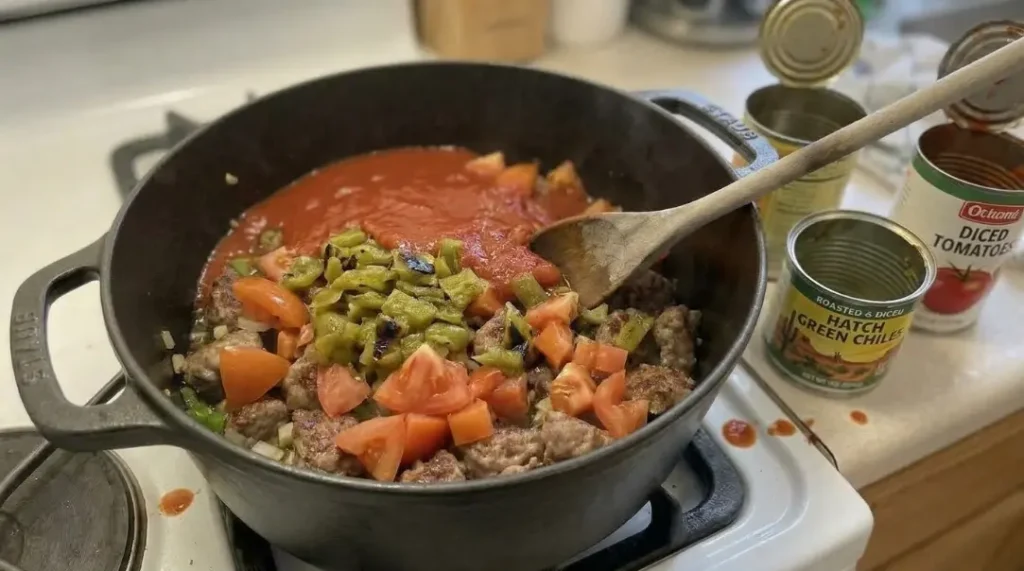
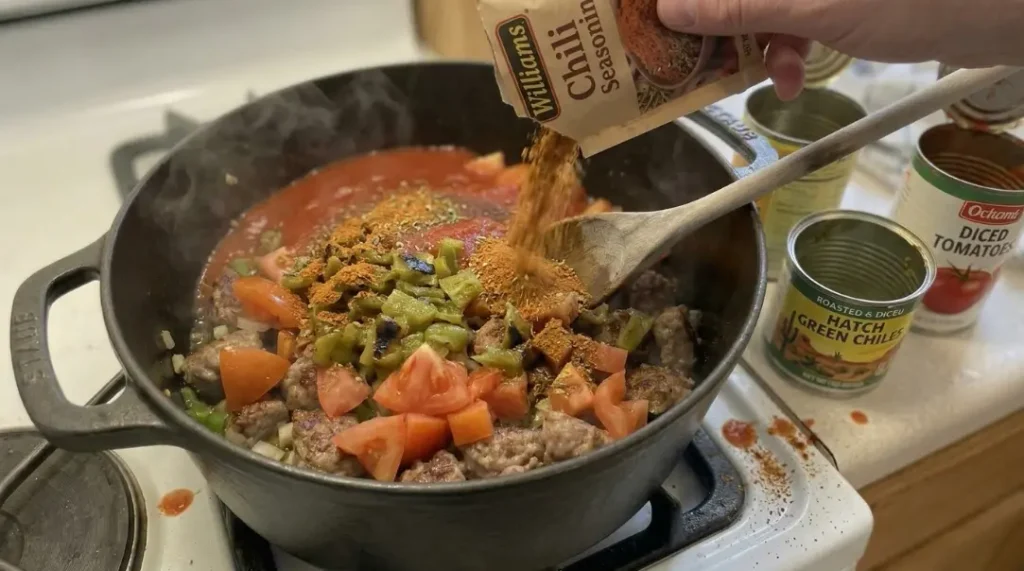
Add the diced tomatoes, tomato sauce, Hatch green chiles, tomato paste, and Williams chili mix. Stir slowly and scrape across the bottom of the pot to loosen any browned bits.
The mixture will look fairly loose at first — the long simmer is what turns it into thick chili.
- Return the Beef and Simmer
Return the browned ground chuck to the pot. Stir until the beef is evenly mixed into the tomato base.
People tend to rush this step, but it’s worth resisting. Lower the heat, cover the pot, and let the chili simmer gently for 1 hour. Stir about every 15 minutes, checking that the bottom isn’t catching.
You should see small bubbles rather than an aggressive boil. The aroma will become deeper as the chili cooks.
- Add the Chili Beans
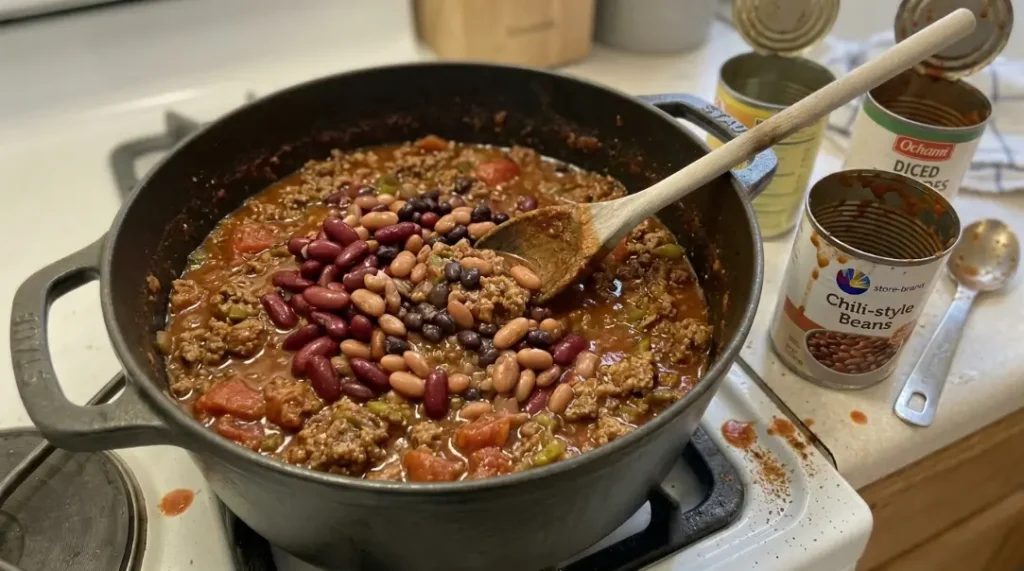
After the first hour, stir in all three cans of Bush’s Chili Magic beans. Don’t mash them as you stir. You want the beans to stay whole and easy to see in each serving.
Leave the pot uncovered and simmer for another 30 minutes. The sauce should slowly become thicker during this final stage.
- Taste, Rest, and Serve
Give the chili a final taste. Adjust the heat or seasoning only if needed, especially before adding extra salt because the sausage, seasoning mix, and canned beans already contain salt.
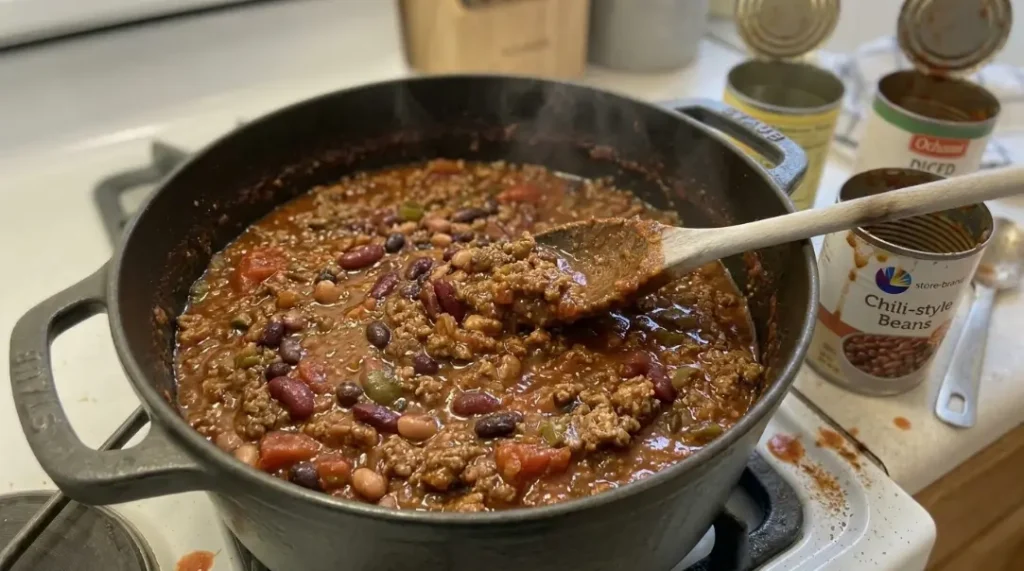
Turn off the heat and let the chili sit for about 10 minutes. It should be thick enough to cling to a spoon, with visible pieces of beef, sausage, peppers, and beans.
Specific Serving Suggestions
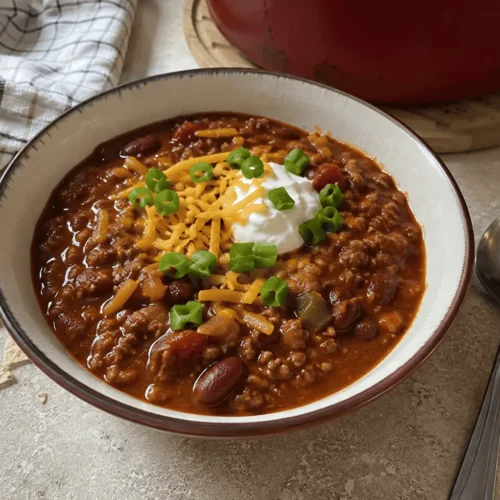
I like this chili with sharp cheddar cheese, because the creamy cheese softens the heat and adds a salty bite.
Warm cornbread is another natural match. A slightly sweet cornbread works especially well against the smoky peppers and spicy sausage.
For crunch, add tortilla chips or saltine crackers right before eating. The contrast with the thick chili is surprisingly good.
You can also turn leftovers into a completely different meal:
- Spoon it over a baked potato with cheddar.
- Mix it with cooked elbow macaroni for chili mac.
- Use it over tortilla chips with cheese for loaded chili nachos.
- Put it on hot dogs and finish with diced onion.
- Add a spoonful to a grilled cheese sandwich for a hearty dip.
For toppings, I usually keep it simple with cheddar, sour cream, sliced jalapeños, and diced green onion.
Pepper Belly Pete chili

Equipment
- Large heavy-bottomed pot or Dutch oven
- Wooden spoon
- Sharp chef's knife
- Cutting board
- Measuring spoons
Ingredients
- 3 pounds ground chuck
- 1 pound hot breakfast sausage
- 1 large onion diced
- 3 –4 fresh jalapeños chopped
- 3 cloves garlic minced
- 44 ounces diced tomatoes
- 44 ounces tomato sauce
- 4 ounces Hatch green chiles
- 6 ounces tomato paste
- 3 ounces Williams chili mix
- 3 cans Bush’s Best Chili Magic medium Campfire Style beans
Instructions
- Brown the ground chuck in a large pot over medium-high heat for 8–10 minutes. Drain and set aside.
- Brown the hot breakfast sausage in the same pot. Leave the rendered sausage fat in the pot.
- Add onion, jalapeños, and garlic. Cook for about 5 minutes until softened and fragrant.
- Add diced tomatoes, tomato sauce, Hatch green chiles, tomato paste, and Williams chili mix. Stir well.
- Return the ground chuck to the pot. Cover and simmer gently for 1 hour, stirring every 15 minutes.
- Stir in the three cans of chili beans.
- Simmer uncovered for another 30 minutes, stirring occasionally.
- Taste, adjust seasoning if needed, and rest for 10 minutes before serving.
Notes
- Make ahead: Prepare the chili one day ahead and refrigerate it. Reheat gently on the stovetop before serving.
- Heat adjustment: Remove jalapeño seeds and use mild sausage for a milder pot.
- Bean substitution: Use cooked kidney or pinto beans in place of the chili beans, but drain and rinse them first.
- Too thick: Add water or beef broth 1–2 tablespoons at a time while reheating.
How to Store and Reheat Pepper Belly Pete Chili
Let leftover chili cool before transferring it to shallow airtight containers. Refrigerate it within 2 hours of cooking and use it within 4 days, per USDA guidance on storing cooked ground meat dishes.
For longer storage, freeze the chili in individual portions for up to 3 months. Leave a little room in each container because the chili expands as it freezes.
For the best texture, thaw frozen chili overnight in the refrigerator.
Reheat it on the stovetop over medium-low heat, stirring occasionally, until it reaches 165°F throughout — the USDA’s minimum safe reheating temperature for cooked meat. If it has become very thick, add 1–2 tablespoons of water or beef broth at a time until it loosens.
You can also microwave individual portions. Cover loosely and heat in 60–90 second intervals, stirring between each interval.
Pepper Belly Pete Chili FAQs
What makes Pepper Belly Pete chili different from regular chili?
The combination of ground chuck and hot breakfast sausage gives this chili a richer meat base than many standard beef-only versions. Jalapeños, Hatch green chiles, and chili seasoning then add several layers of pepper flavor rather than relying on one source of heat.
How spicy is Pepper Belly Pete chili?
I’d call it moderately spicy, but the final heat depends heavily on the sausage and jalapeños you use. Removing the jalapeño seeds and choosing mild sausage will make a noticeable difference. For more heat, leave the seeds in or add extra fresh jalapeño.
Should I drain the chili beans before adding them?
Not for the Bush’s Chili Magic version. The seasoned sauce in the cans is part of the recipe’s overall texture and flavor. If you substitute plain canned beans, drain and rinse them first and adjust the seasoning afterward.
Why is my chili too watery after simmering?
Usually the lid wasn’t fully off during that last 30 minutes, or the heat was too low for real evaporation. Take the lid all the way off, bump the heat slightly, and stir every few minutes so the bottom doesn’t scorch. If it’s still loose after 45 minutes uncovered, your tomatoes were probably higher-moisture than average — a tablespoon of tomato paste stirred in will thicken it fast.
Can I make Pepper Belly Pete chili a day ahead?
Absolutely. I actually like making it the day before serving. Once chilled and reheated, the meat, peppers, tomatoes, and seasoning have had more time to settle together. Store it refrigerated for no more than 4 days.
Can I make this chili in a slow cooker?
Yes, but brown both meats first rather than putting them into the slow cooker raw. Transfer the cooked meat and remaining ingredients to the slow cooker and cook on low for about 6–8 hours. Add the beans toward the end if you want them to retain more of their shape.
I make this Pepper Belly Pete Chili when I want a single big pot that feeds a table and still leaves good leftovers. I keep the toppings simple, let the pot simmer slowly, and don’t skip that final uncovered cooking time.
