
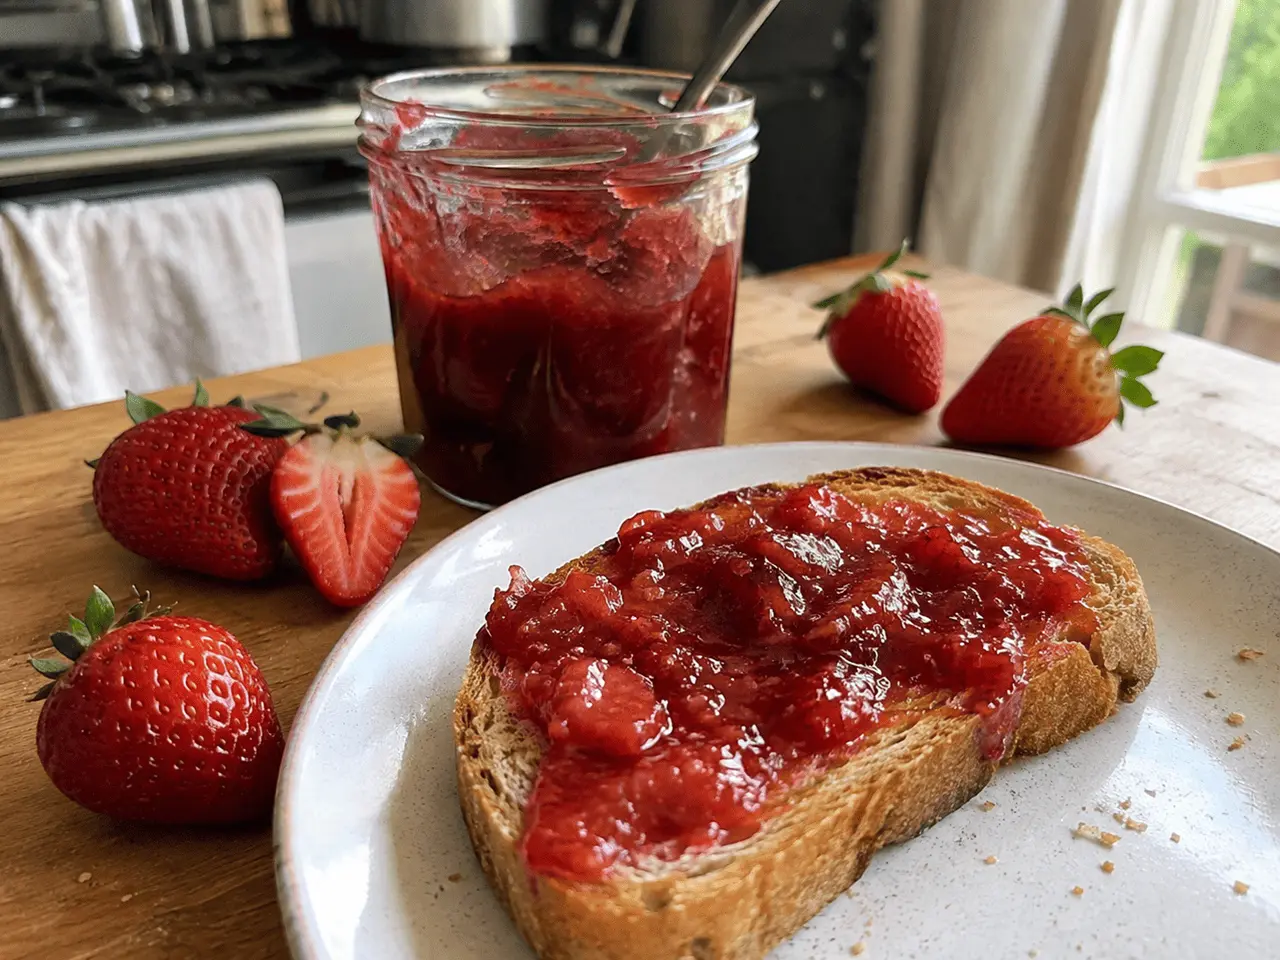
A warm slice of toast with strawberry jam is one of those small breakfasts I never get tired of. I especially like it when the jam is still a little cool from the refrigerator and the toast is hot enough to make it soften at the edges.
Homemade strawberry jam tastes different from the very smooth jars I grew up buying. You get tiny pieces of real fruit, a bright berry flavor, and just enough lemon to keep the sweetness from becoming heavy. The kitchen also smells like strawberries while it cooks, which is a pretty good reason to make it.
I make this version with just three main ingredients: strawberries, sugar, and lemon juice. There’s no need for a packet of pectin. Strawberries are naturally low in pectin, so the trick is to cook the fruit long enough for the water to reduce and the sugar and natural pectin to do their work.
The part that deserves your attention is the final few minutes. A jam that looks slightly loose in the pot can become nicely thick once it cools. Stop too early and you have strawberry sauce. Cook it too long and the jam can become stiff and sticky. I’ll show you how I check for that sweet spot.
Why Strawberry Jam Can Turn Out Too Runny
Strawberries contain less natural pectin than many fruits. That’s why homemade strawberry jam can sometimes look more like syrup than jam, especially when the berries are very juicy. Sugar, acid, heat, and enough evaporation all matter when you’re making a no-pectin jam.
I also recommend chopping the berries rather than dropping large whole strawberries into the pot. Smaller pieces cook down more evenly and give the finished jam a better texture. You can leave some pieces a little larger if you like a chunkier spread, but very large pieces can stay watery inside while the syrup around them thickens.
The other important detail is temperature. I aim for about 220°F (105°C) at sea level. A candy or digital thermometer makes this much easier. You can also use the chilled-plate test if you don’t have one.
Don’t worry if the jam seems a touch thinner than you want while it’s still boiling — it will continue to thicken as it cools. If you actually want a pourable consistency instead of a set jam, my strawberry syrup recipe skips this reduction step entirely.
Why Lemon Juice Matters in Strawberry Jam
Lemon juice isn’t there just to make the jam taste lemony. It brings acidity to the mixture, balances the sweetness, and helps the natural pectin work properly. It also gives strawberry jam a brighter flavor instead of letting the cooked sugar take over.
I prefer fresh lemon juice for a refrigerator jam because the flavor is cleaner. If you’re following a tested canning recipe for shelf-stable storage, use the type of lemon juice and acidity level specified by that recipe — don’t improvise the acid level. The National Center for Home Food Preservation publishes tested strawberry jam recipes with safe acidity levels if you want a reliable starting point.
Strawberry Jam Ingredients
- 2 pounds (900 g) fresh strawberries, hulled and chopped — Choose berries that are deeply red and smell strongly of strawberries. Very ripe berries are useful here as long as they have no mold or spoilage.
- 1¼ cups (250 g) granulated sugar — Sugar sweetens the berries, but it also helps the mixture thicken as water cooks away.
- 2 tablespoons (30 ml) fresh lemon juice — The acidity balances the sweetness and helps the jam develop its proper texture.
What Kind of Strawberries Should You Buy?
I look for berries that are red from top to bottom with a fresh, sweet smell. A few soft berries are fine. In fact, very ripe strawberries can have excellent flavor for jam.
I would skip anything moldy. Don’t try to cut around moldy spots and use the rest of the berry.
If your strawberries are extremely large, cut them into smaller pieces before cooking. You want the fruit to break down without having to cook the jam for an unnecessarily long time.
Smart Substitutions
- Frozen strawberries: Use frozen berries if fresh ones aren’t available. Thaw them first and keep the liquid they release. Add it to the pot with the fruit.
- Bottled lemon juice: For a refrigerator batch, fresh lemon juice gives the nicest flavor. For tested canning recipes, bottled lemon juice is often preferred because its acidity is standardized.
- Granulated sugar: Regular white granulated sugar is the simplest choice. I wouldn’t replace it with a smaller amount of honey or another liquid sweetener without changing the recipe, because sugar plays a role in the final texture as well as sweetness.
- Chunkier jam: Cut the strawberries into roughly ½-inch pieces instead of finely chopping them. Expect a little more visible fruit in the finished spread.
- Smoother jam: Mash the strawberries during cooking with a potato masher. For a very smooth texture, you can briefly pulse the raw berries before cooking.
How to Make Strawberry Jam
- Hull and Chop the Strawberries
Wash the strawberries and remove the green tops. Pat them dry, then cut the berries into small pieces.
I don’t worry about making every piece identical. The fruit will soften and break down in the pot. Smaller pieces simply help the jam cook more evenly.
- Combine Everything in a Wide Pot
Add the chopped strawberries, sugar, and lemon juice to a medium or large saucepan. Stir well so the sugar coats the berries.
Let the mixture sit for a few minutes if you have time. You’ll quickly see juice collecting at the bottom as the sugar pulls moisture from the strawberries.
Use a pot with plenty of room. Strawberry jam can foam and bubble up much more than you expect during a hard boil.
- Cook Until the Sugar Dissolves
Set the pot over medium heat. Stir occasionally as the strawberries release more juice.
At first, the mixture will look wet and loose. The sugar should dissolve completely before you push the heat higher. You should no longer feel gritty sugar on the bottom of the pot.
- Bring the Jam to a Rolling Boil
Once the sugar has dissolved, increase the heat and bring the mixture to a strong boil. Stir regularly and scrape across the bottom of the pan.
I don’t walk away from the pot during this step. The mixture becomes very hot and sticky, and the bottom can catch if you leave it unattended.
If the bubbles become too aggressive or the jam starts climbing the sides of the pot, lower the heat slightly.
- Cook Until It Reaches 220°F
Continue cooking until the jam thickens and reaches about 220°F (105°C). Depending on the berries, pot, and heat, this can take roughly 25 to 45 minutes.
Stir often as the mixture gets thicker. You’ll notice the bubbles change from watery and fast to slower, thicker bubbles. The jam should coat the spoon instead of running off like thin strawberry juice.
A thermometer is the easiest way to judge this stage, but don’t rely on temperature alone. The final texture matters too.
- Use the Chilled-Plate Test if Needed
If you don’t have a thermometer, place a small plate in the freezer while the jam cooks.
When you think the jam is ready, spoon a small amount onto the cold plate. Let it cool briefly, then push it with your fingertip or tilt the plate.
If the jam runs like syrup, cook it a little longer. If it holds its shape and wrinkles slightly when pushed, you’re close to the right consistency.
- Transfer the Jam to Clean Jars
Take the jam off the heat as soon as it reaches the desired consistency. Carefully spoon or ladle it into clean, dry jars.
Don’t fill the jars all the way to the top. Leave a little room and wipe away any drips around the rim before closing.
Let the jars cool, then refrigerate them.
- Let It Finish Setting
I like to let the jam chill overnight before judging the final texture — this is the real test, not how it looks in the pot.
If your finished jam is slightly softer than you wanted, don’t panic. That’s much easier to fix than an overcooked batch.
Specific Serving Suggestions
This jam has plenty of uses beyond toast.
- Spread it over buttered sourdough or French bread for a simple breakfast.
- Spoon it onto warm biscuits or scones with a little whipped cream.
- Swirl a teaspoon into plain Greek yogurt with granola.
- Add a spoonful to overnight oats for natural strawberry flavor.
- Warm a little jam and brush it over pancakes or waffles.
- Layer it between vanilla cake and whipped cream for a simple strawberry filling.
- Use it as the fruit layer in thumbprint cookies.
- Spoon it over vanilla ice cream while the jam is slightly warm.
- Spread it inside a peanut butter and jam sandwich.
- Add a small spoonful to a simple vinaigrette for a sweet-tart dressing.
Greek yogurt, cream cheese, mascarpone, and whipped cream all mellow the sweetness nicely if you want something creamier than toast,
Strawberry Jam Recipe

Equipment
- Medium or large saucepan
- Cutting board
- Sharp knife
- Wooden spoon or heat-safe spatula
- Clean glass jars
Ingredients
- 2 pounds 900 g fresh strawberries, hulled and chopped
- 1¼ cups 250 g granulated sugar
- 2 tablespoons 30 ml fresh lemon juice
Instructions
- Hull and chop the strawberries into small pieces.
- Add strawberries, sugar, and lemon juice to a medium or large saucepan.
- Cook over medium heat until the sugar has dissolved and the berries are juicy.
- Increase the heat and bring the mixture to a rolling boil.
- Cook until thickened and the mixture reaches about 220°F (105°C), stirring often.
- If you don’t have a thermometer, test a small spoonful on a chilled plate. The jam should hold its shape rather than run like syrup.
- Remove from the heat and carefully transfer to clean jars.
- Cool, cover, and refrigerate. The jam will thicken further as it chills.
Notes
- Make ahead: Let the jam chill overnight before deciding whether the final texture is right.
- For frozen berries: Thaw completely and include the liquid released by the strawberries.
- Storage: Keep refrigerator jam sealed and refrigerated for about 2–3 weeks; freeze for up to 1 year.
- Texture fix: If the jam is too runny, cook it again to about 220°F. If it’s too thick, gently warm it and stir in a small splash of water.
Storage and Reheating
For a small homemade batch that isn’t processed for shelf-stable canning, keep the jam refrigerated in a clean, airtight jar.
A practical refrigerator window is about 2 to 3 weeks for best quality. Some recipes give longer refrigerated storage, but I prefer to keep homemade refrigerator jam on the shorter side and use a clean spoon every time.
You can also freeze the jam. Transfer it to a freezer-safe container and leave about 1 inch of headspace because the jam expands as it freezes. Properly frozen homemade strawberry jam can keep for up to 1 year.
Thaw frozen jam in the refrigerator overnight.
You normally don’t need to reheat strawberry jam. If it’s too firm after chilling, spoon out the amount you need and warm it gently in a small saucepan over low heat, stirring often. A microwave also works in 10- to 15-second bursts, with stirring between each burst.
For shelf-stable pantry storage, don’t simply fill jars and leave them on the counter. Use a tested water-bath canning procedure — the USDA Complete Guide to Home Canning is the standard reference for safe processing times.
Frequently Asked Questions
How long does homemade strawberry jam last in the fridge?
For this refrigerator-style jam, I recommend using it within about 2 to 3 weeks. Keep it sealed and refrigerated, and always use a clean, dry spoon when serving.
Why is my strawberry jam not setting?
The most common reason is that the mixture hasn’t cooked long enough to remove enough water. Strawberries are naturally low in pectin, so cooking to the proper temperature or passing the chilled-plate test is important for a no-pectin recipe.
Can I make strawberry jam without pectin?
Yes. This recipe doesn’t use added pectin. The strawberries provide some natural pectin, while sugar, lemon juice, and cooking help create the final jam texture.
What should I do if my strawberry jam is too runny?
Put it back into a saucepan and cook it gently until it reaches about 220°F, then test a small amount on a chilled plate. Don’t keep cooking blindly, because an extra few minutes can make a big difference once the mixture has reduced.
Can I use frozen strawberries for strawberry jam?
Yes. Thaw the berries first and keep the liquid they release. Frozen strawberries may need slightly different cooking time because the amount of water in the fruit can vary.
Why did my strawberry jam become too thick?
It was likely cooked too long or reduced too far. If the jam is only slightly too thick, warm it gently and stir in a small splash of water until the texture loosens.
Can I reduce the sugar in strawberry jam?
You can, but I wouldn’t simply cut the sugar without expecting a texture change. Sugar isn’t only there for sweetness; it also helps the jam thicken and preserve quality. If you want a low-sugar jam, use a recipe specifically developed and tested for reduced sugar.
A Simple Jar of Summer
I love recipes like this because they turn a box of strawberries into something that lasts beyond breakfast the next morning. Once you get comfortable watching the bubbles and checking the set, homemade strawberry jam becomes surprisingly simple.
I keep a small jar in the fridge whenever strawberries are especially good — it turns a five-minute breakfast into something worth slowing down for.
